Introduction
A time comes when you want to upgrade your gears in your desktop, say a CPU. Either your use case changes or you have different needs, which force you to look for a different, more beefy CPU. In general CPU exchange is limited to swapping the CPU in the socket. But is that all?
Upgrading your cooling solution
Depending on your setup, your old CPU may have behaved well with the current cooling you have. It was selected to satisfy the needs of your old CPU by providing enough heat dissipation. But a CPU upgrade may cause your cooling solution to be insufficient, especially if the performance gap between the old and new CPU is significant. In this blog post I will show you a short story of upgrading from Intel Core i5-12600K to Intel Core i9-14900K and a standard fan+radiator solution to liquid cooling solution and what difficulties you may encounter during such journey. My entry point is the MSI PRO Z690-A DDR4 Full PC build with Dasharo firmware and a custom chassis: MSI MAG FORGE 111R.
Choosing an appropriate model
Choosing a liquid cooling model is not that simple task. First of all you have to take the chassis dimensions into consideration. So it is necessary to take a tape measure and note the dimensions of the chassis sides with mounting holes. Typically this is a top or front side (at least in my case). These should be prepared to fit 120 mm wide fans or radiators by standard. However, depending on the height on the chassis, the number of fans you will be able to fit will be different. In my case the choice was as follows:
- take liquid cooling with 2x120mm fans (either on top or front side)
- take liquid cooling with 3x120mm fans (only front side)
Thankfully my front side can fit 3x120mm and considering the performance gap in my CPUs, I decided to go with 3x120mm solution MSI MAG Coreliquid 360R v2. But little did I know back then that mounting it will not be an easy task.
Watching liquid cooling mounting tutorials
I may be a BIOS/firmware developer, but little do I know about advanced PC assembling like liquid cooling assembly. Before I could start playing with it, I had to watch a few tutorials how to NOT mount the liquid cooling to make it perform at its best. Personally I recommend the following in general:
They give very good overview how to properly mount a liquid cooling. That’s what I watched initially when getting to know how to deal with liquid cooling.
Mounting the liquid cooling
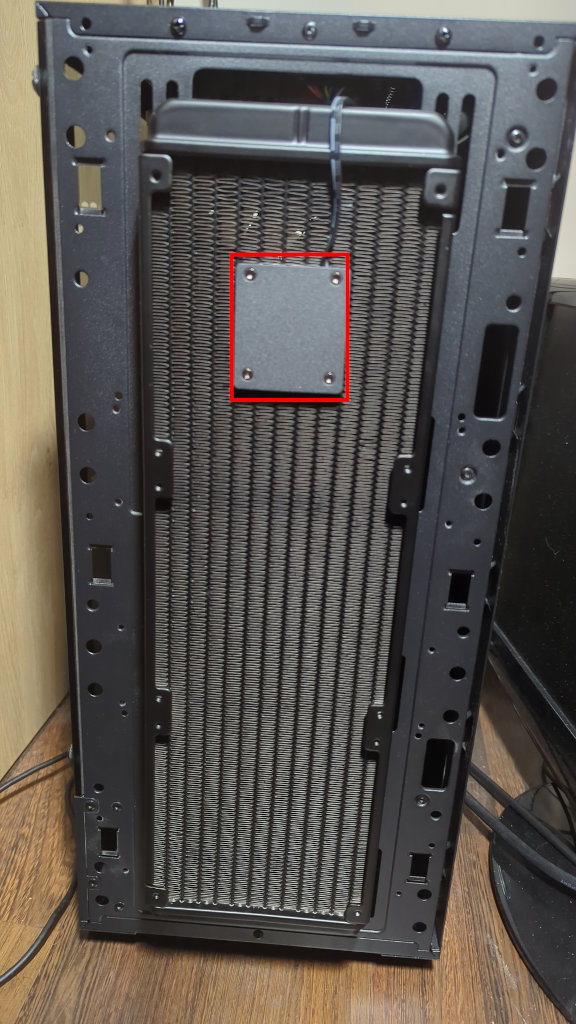
Now that I have been promoted from total noob, to a beginner, I have unboxed the cooling parts and started mounting them. Having learned about the air bubbles and recommended mounting I have decided to mount it on the front side of the chassis with the pipes going upwards to the CPU cooling block. This should ensure that the pump will live a long life. Yes…
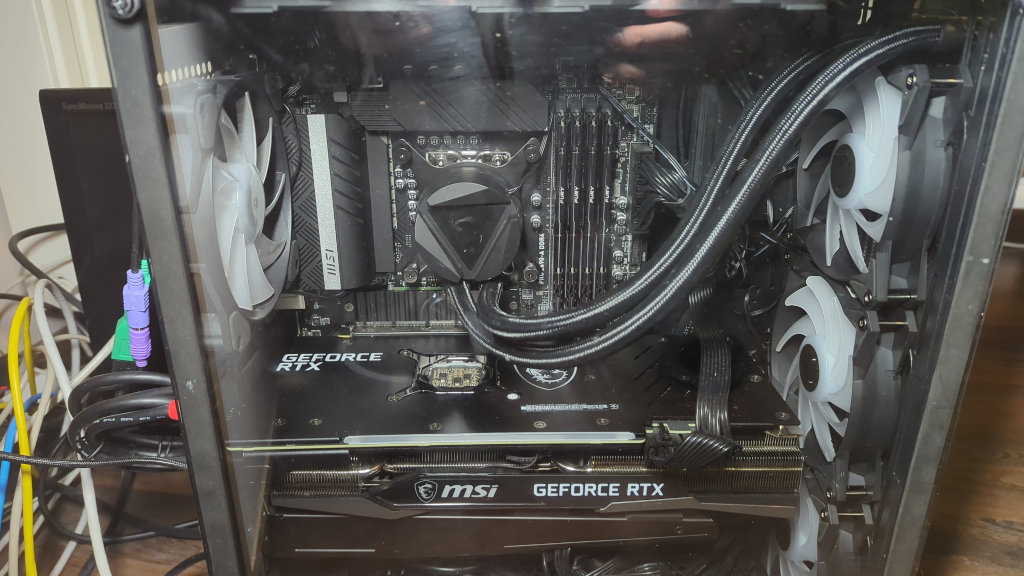
That’s where the hardships began. I own a Nvidia RTX 3060, which is quite a big monster to be honest. To my surprise, when I mounted every parts of the cooling according to my initial plan, it occurred that I can no longer fit my graphics card… The cooling pipes going from radiator to the CPu cooling block were too short to pass them around the Nvidia GPU. So either I had to put a smaller GPU or resign from liquid cooling. It was very bad news for me.
But then I took another look at the radiator carefully and noticed, that the pump is actually not in the CPU cooling block, but in the radiator itself!
Remembering physics back from the school, if I placed the radiator with the pipes on the upper side, the air bubbles would not get into the pump right? To be sure I have searched for a more suitable tutorial, specific to my liquid cooling model and I found Gear Seeker’s guide which explicitly says that this cooling should be mounted with the pipes upside. You may imagine what relief I have felt when I watched it. I took apart the cooling from my chassis right away and started mounting it with the pipes on the upper side. THanks to that the pipes would no longer need to go around my GPU (they would actually be hanging above the card with plenty of free space).
Cooling efficiency
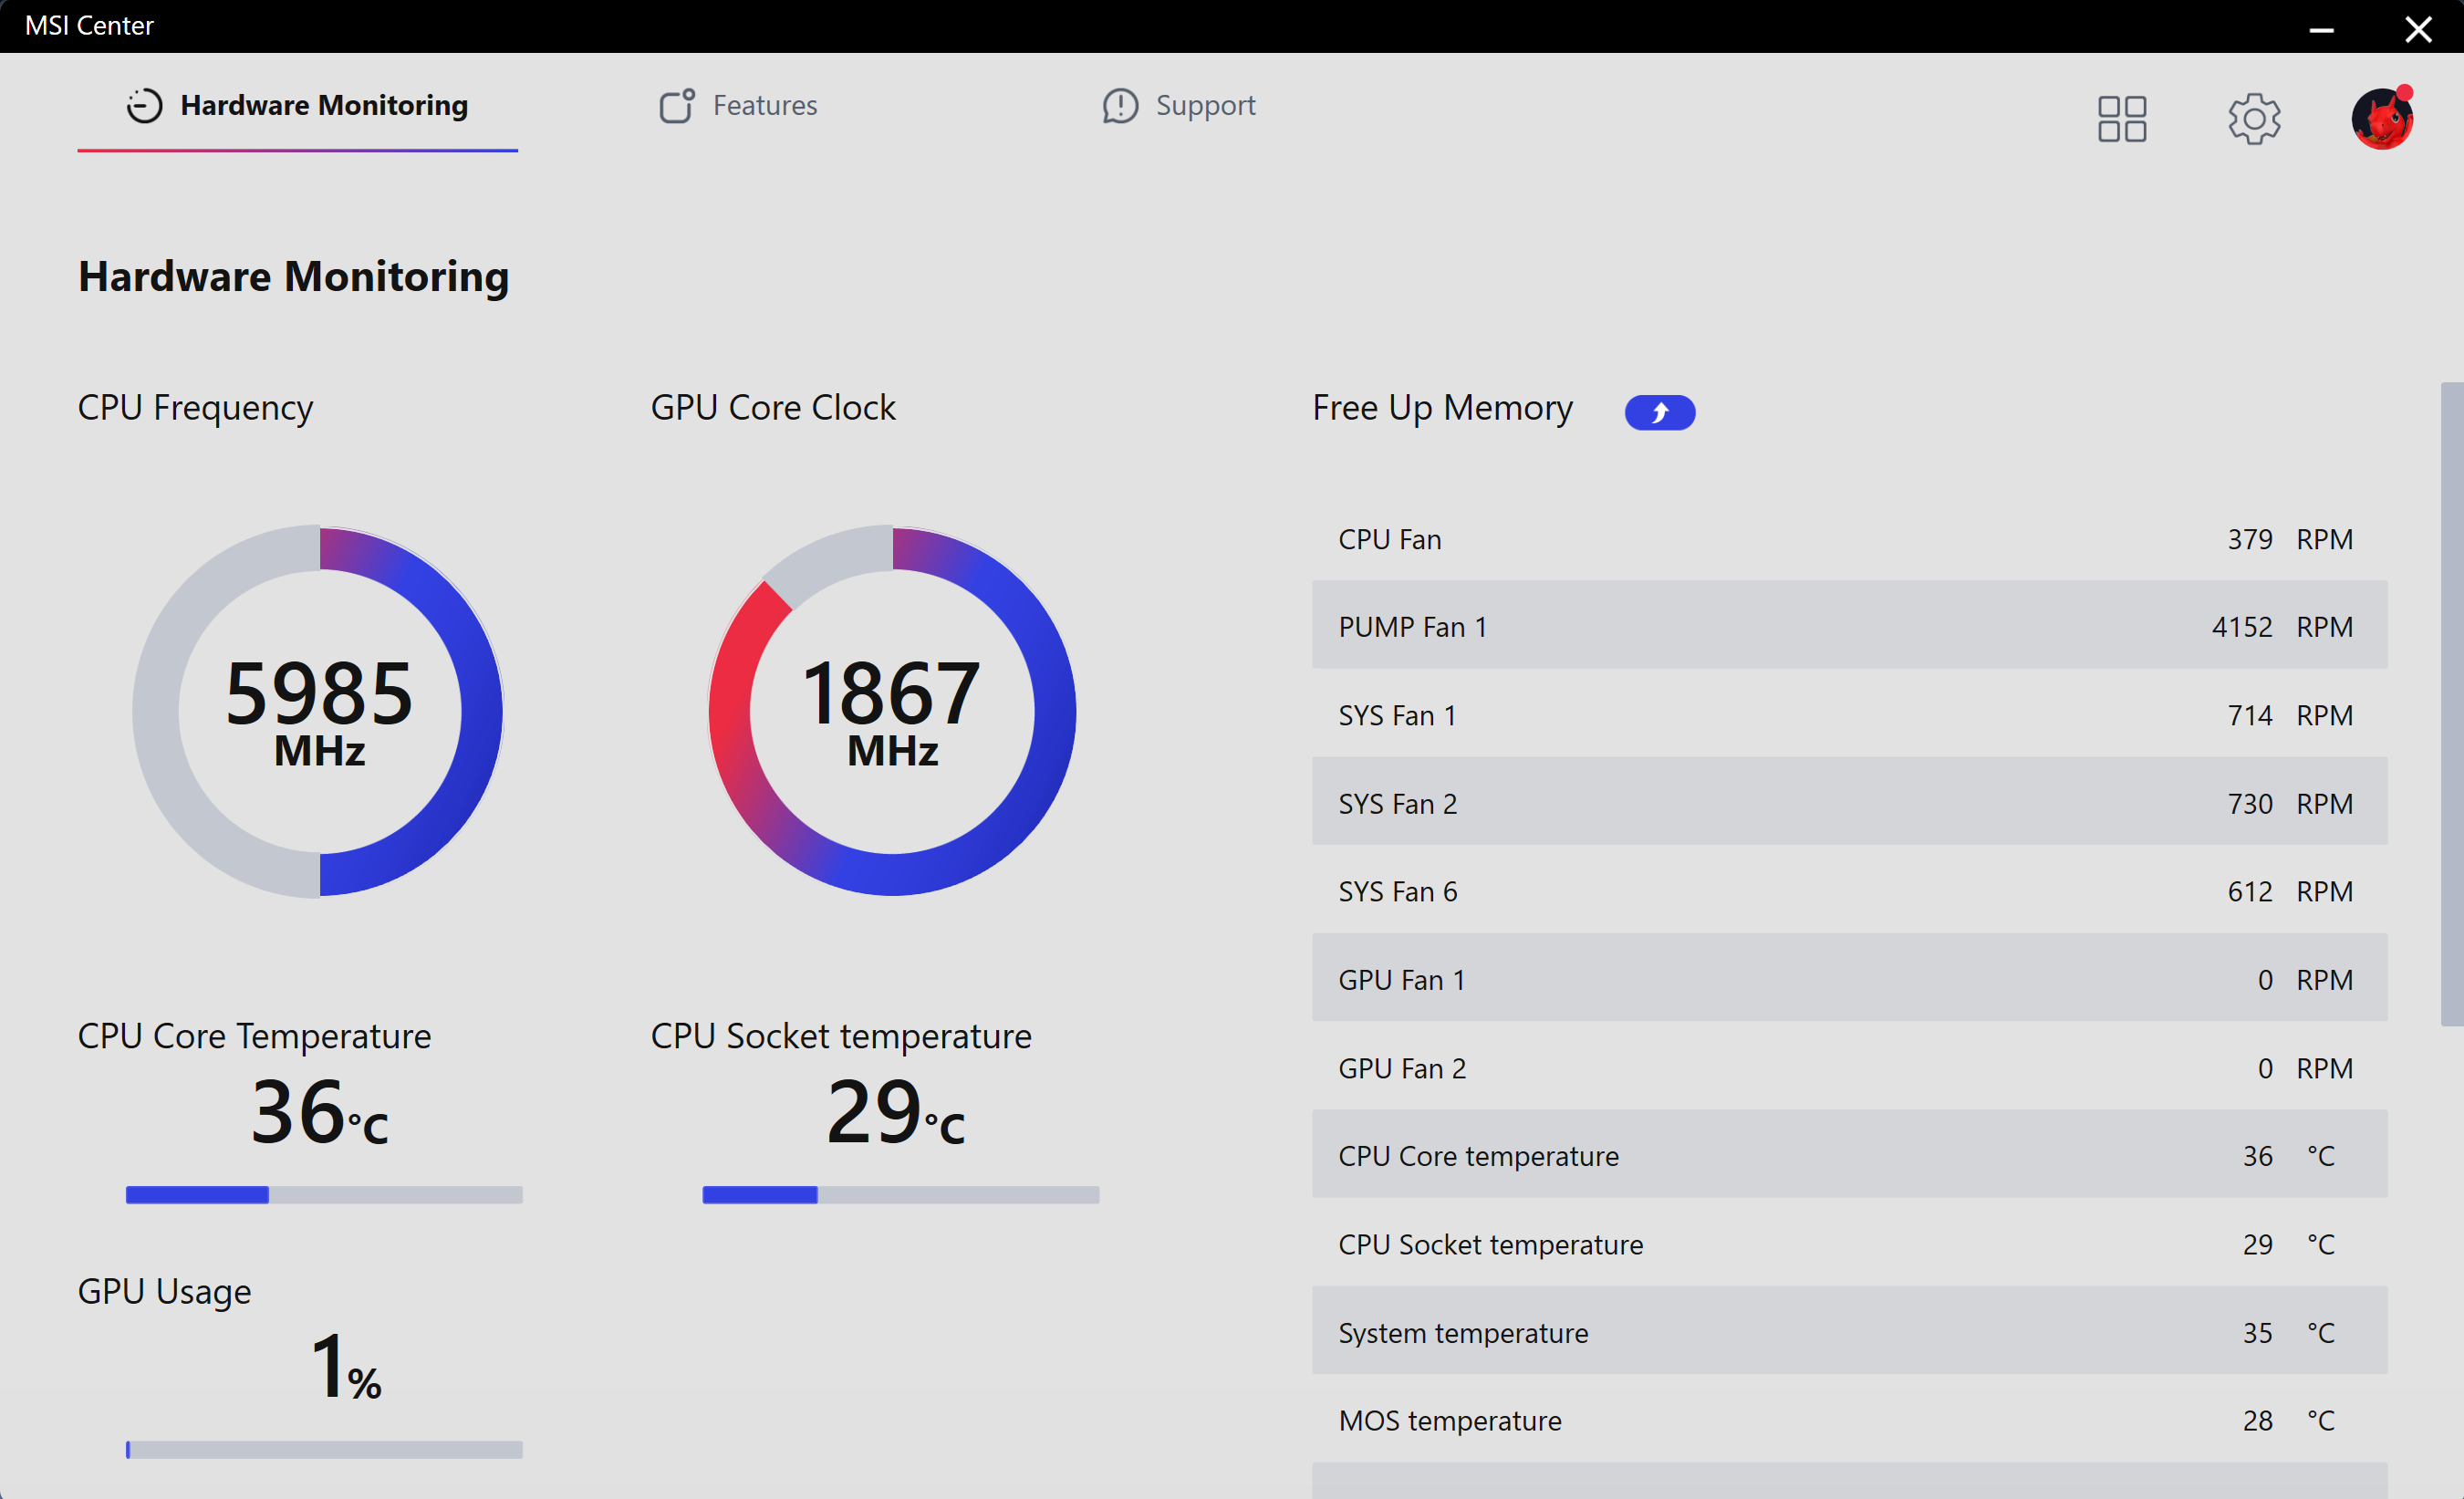
I have no comparison of liquid cooling on a i5-12600K, so I can only share the results of i9-14900K. When idling the CPU stays at around 40 Celsius degrees.
When playing a not-so-heavy game like League of Legends for example, the temperature varies from 60 to 80 degrees depending on the load.
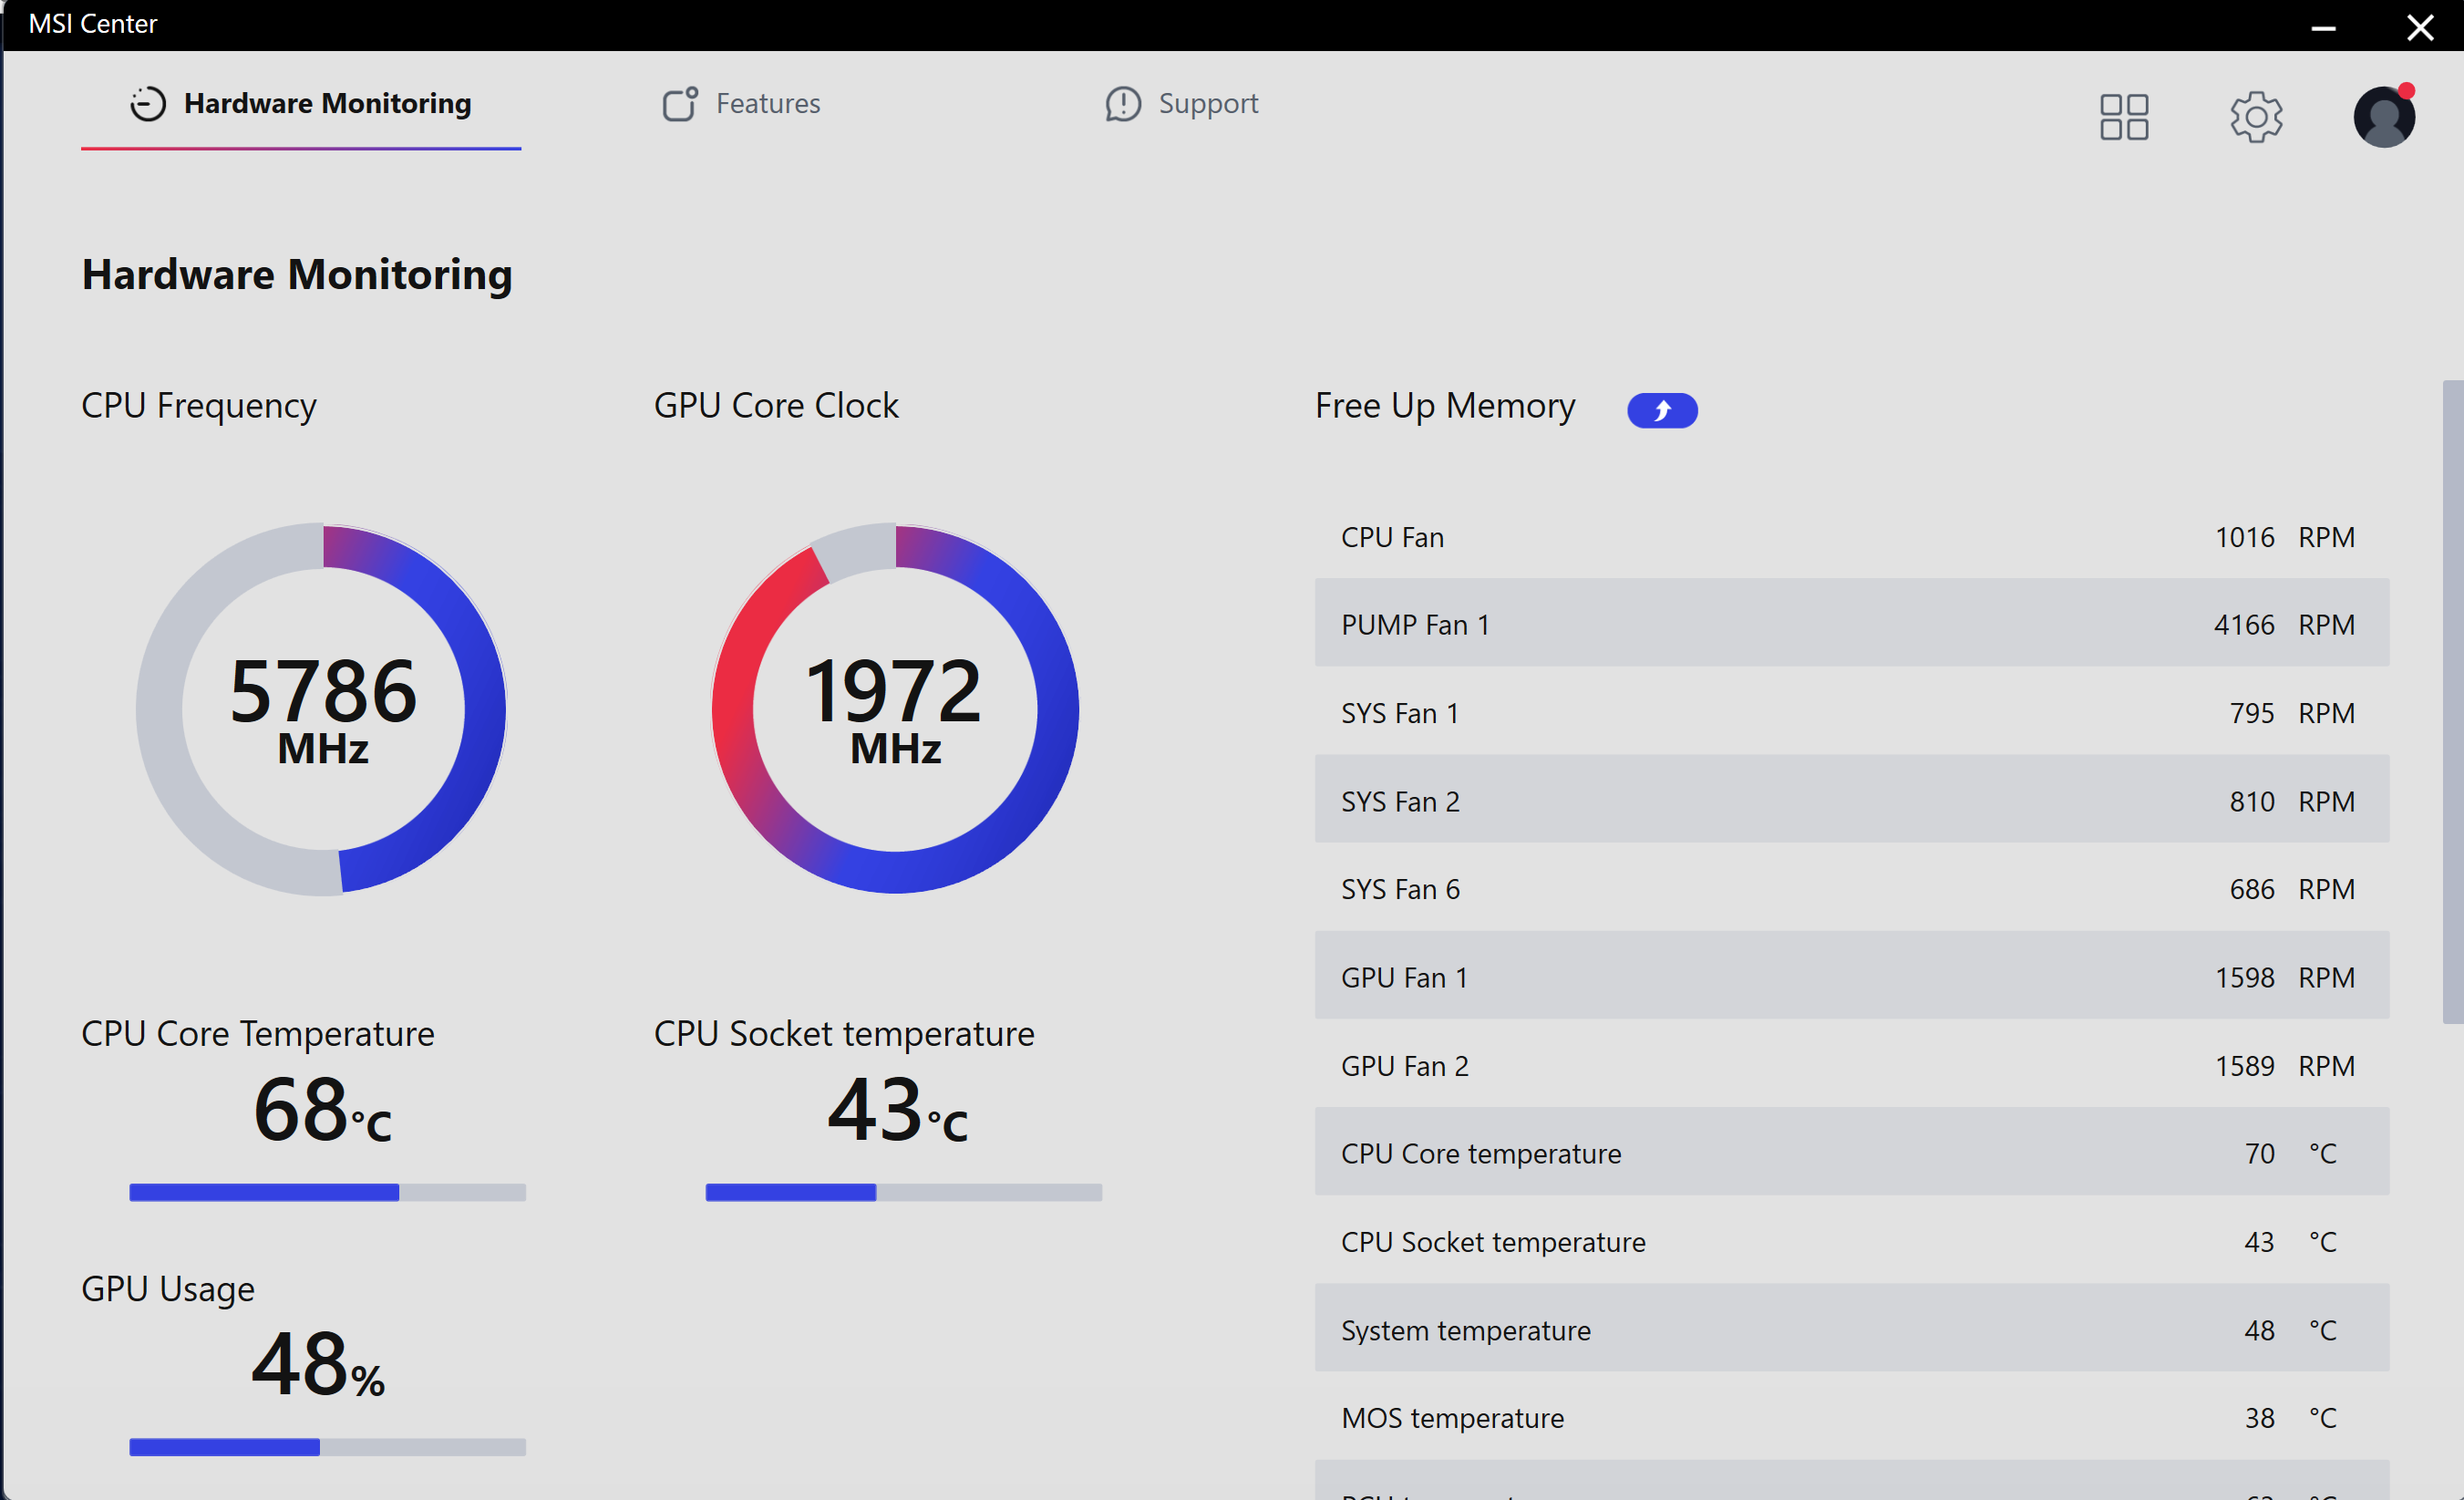
This is where the fans are getting a bit noisy. I am considering adjusting the fan curves to reduce the loudness. Also the pump is generating its own constant noise, which is much more audible than fan+radiator solution. Although there are no BIOS setup options for adjusting fan curves yet, but automatic fan control is coming to Dasharo firmware v1.1.3 compatible with MSI PRO Z690-A (DDR4), so manual adjusting of the temperature/speed points in code and recompilation will be possible.

Liquid cooling should have a bit more heat capacity than fan+radiator solution and so the inertia of cooling will be different (there is no need to spin the fans to high speed right away when CPU crosses 80 degrees, because the liquid is still probably much colder than that). But that is a topic for another story and hopefully a blog post.
Summary
Had I watched more tutorials I could save a few hours of time and nerves… Despite being an experienced engineer working with hardware everyday, I still underestimated the amount of information I need to get the best out of the products I have bought.
If you liked the content or have questions, follow me on my social media. I am also very active on the Dasharo Matrix with the rest of the team. I also encourage to follow 3mdeb social media to be up to date with what we are doing:
Unlock the full potential of your hardware and secure your firmware with the
experts at 3mdeb! If you’re looking to boost your product’s performance and
protect it from potential security threats, our team is here to help. Schedule
a call with
us or
drop us an email at contact<at>3mdeb<dot>com to start unlocking the hidden
benefits of your hardware. And if you’re looking for hardware that’s ready to
work with open-source firmware solutions, check out our Dasharo Supported
hardware —
a selection of devices optimized for security, transparency, and performance.
And if you want to stay up-to-date on all things firmware security and
optimization, be sure to sign up for our newsletter: