RockChip is a Chinese company manufacturing low-cost ARM SoCs , yet with good performance. Another advantage is reasonably good support for mainline Linux with many drivers already mainlined. Documentation for the most popular RockChip SoCs and schematics of reference boards are publicly available. Unfortunately, they are severely lacking in the area of Secure Boot, with very unclear instructions on how to enable it. Besides incomplete official documentation, there is no meaningful information available on the Internet. We hope the state of RockChip’s documentation will change for the better soon.
Secure Boot overview
Secure Boot is a feature that prevents a device from running untrusted firmware, essential for securing IoT devices against persistent malware. Without Secure Boot, anyone who gains physical access (or remote access by exploiting software vulnerability) to a device may put malware into its firmware, thus permanently compromising it. With Secure Boot enabled, BootROM verifies firmware before executing it - even if an attacker replaces firmware, it won’t pass verification and thus won’t boot at all.
Secure Boot is implemented both in software and hardware. Most ARM SoCs (including RockChip) come with so-called eFUSE’s, which are used for storing various information, including public key used for establishing Root-of-Trust. eFUSE can be programmed only once, making it impossible to replace or remove the once written key. When a device powers on, it starts executing BootROM. BootROM is a small program that is burned onto ROM during SoC’s manufacturing process, and it’s responsible for loading a next-stage bootloader (usually U-Boot’s SPL). If Secure Boot is enabled, BootROM verifies loaded bootloader against public key stored in eFUSE’s - execution takes place only when verification is successful. From now on, Root of Trust gets extended into Chain of Trust - SPL is responsible for verifying U-Boot, which is responsible for verifying Linux, etc.
To get Secure Boot working, the following things must be done.
- Generate private and public keypair
- Burn public key into eFUSE’s
- Sign
idbloader.img(U-Boot TPL+SPL merged into one file) - Configure Verified Boot in SPL and U-Boot
- Flash signed firmware.
Let’s begin.
Preparing
RockChip provides proprietary binary-only tools for signing code and burning
eFUSEs. Code signing is handled either by rk_sign_tool (Linux) or Secure Boot
Tool (Windows), eFUSE burning is done using eFUSE Tool. Since eFUSE Tool is
Windows exclusive, I had to set up Windows box side-by-side my Linux
workstation.
I checked out latest revisions of RockChip tools and rkbin repos.
First, I had to generate keys for code signing.
|
|
This generated a 2048-bit RSA key. Some of the older RockChip SoCs use 1024-bit RSA instead, while future SoCs may use 4096-bit RSA or even a completely different algorithm.
Signing code
eFUSE Tool accepts only a signed binary as its input, from which it extracts the
public key. The binary used here is the same binary we pass to rkdeveloptool
when flashing firmware to eMMC. I will call it loader from now on.
Loader can be quickly assembled using tools and config files from
rkbin/RKBOOT. For example, to build loader for RK3288, run the following
command (from rkbin directory)
|
|
I signed generated loader binary using rk_sign_tool without any problems.
|
|
But when I tried loading it into eFUSE Tool I’ve got an error.
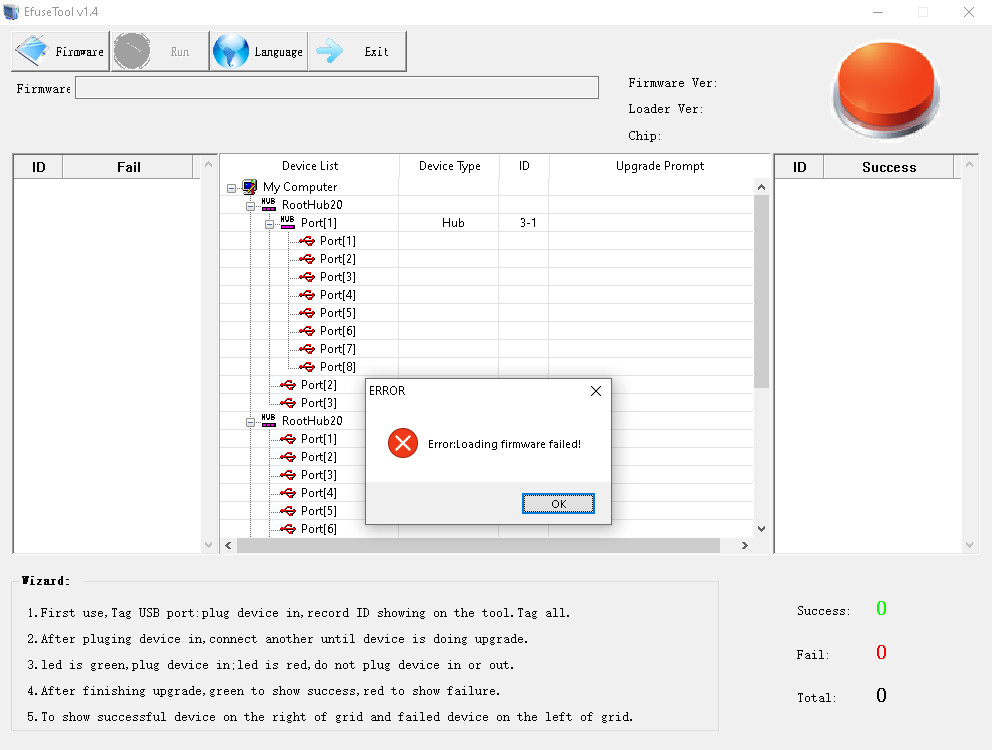
That was an extremely helpful message. To find out what’s wrong, I’ve done a quick analysis of unsigned and signed binary and discovered that the signed version has a different header - this is how the unsigned version looks like.
|
|
And this is the signed version.
|
|
Secure Boot Tool has support for signing loader binary, but it is disabled when program starts. I had to dig through RockChip documentation to find out how to enable it. Hint: press Ctrl+r+k.
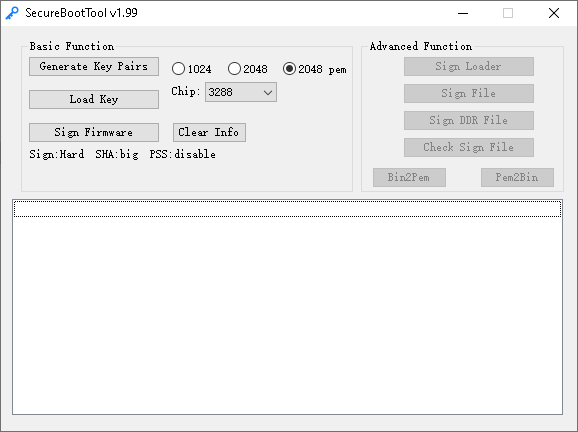
Signing with Secure Boot Tool produced binary with a correct header that eFUSE
Tool understands. Note that even though eFUSE Tool cannot load binaries built by
rk_sign_tool, rkdeveloptool works with them just fine.
Burning eFUSE
This was the most dangerous part as I had only one try. At that time, I didn’t know how eFUSE Tool operates (as there is no documentation) - it burns only public key extracted from binary, or burns the key and flashes binary onto eMMC? What will happen if I get stuck with loader flashed onto eMMC but no U-Boot to load? Does this tool work at all? Will it burn the correct key or some random trash? If fusing succeeds, will be MaskROM mode still available?
RockChip always boots from SPI first, then eMMC, SD card, and finally MaskROM. There is no way to alter the boot order, so the only way to recover (get back into MaskROM) from freezing boot is to prevent BootROM from loading bootloader by shorting the eMMC clock to the ground.
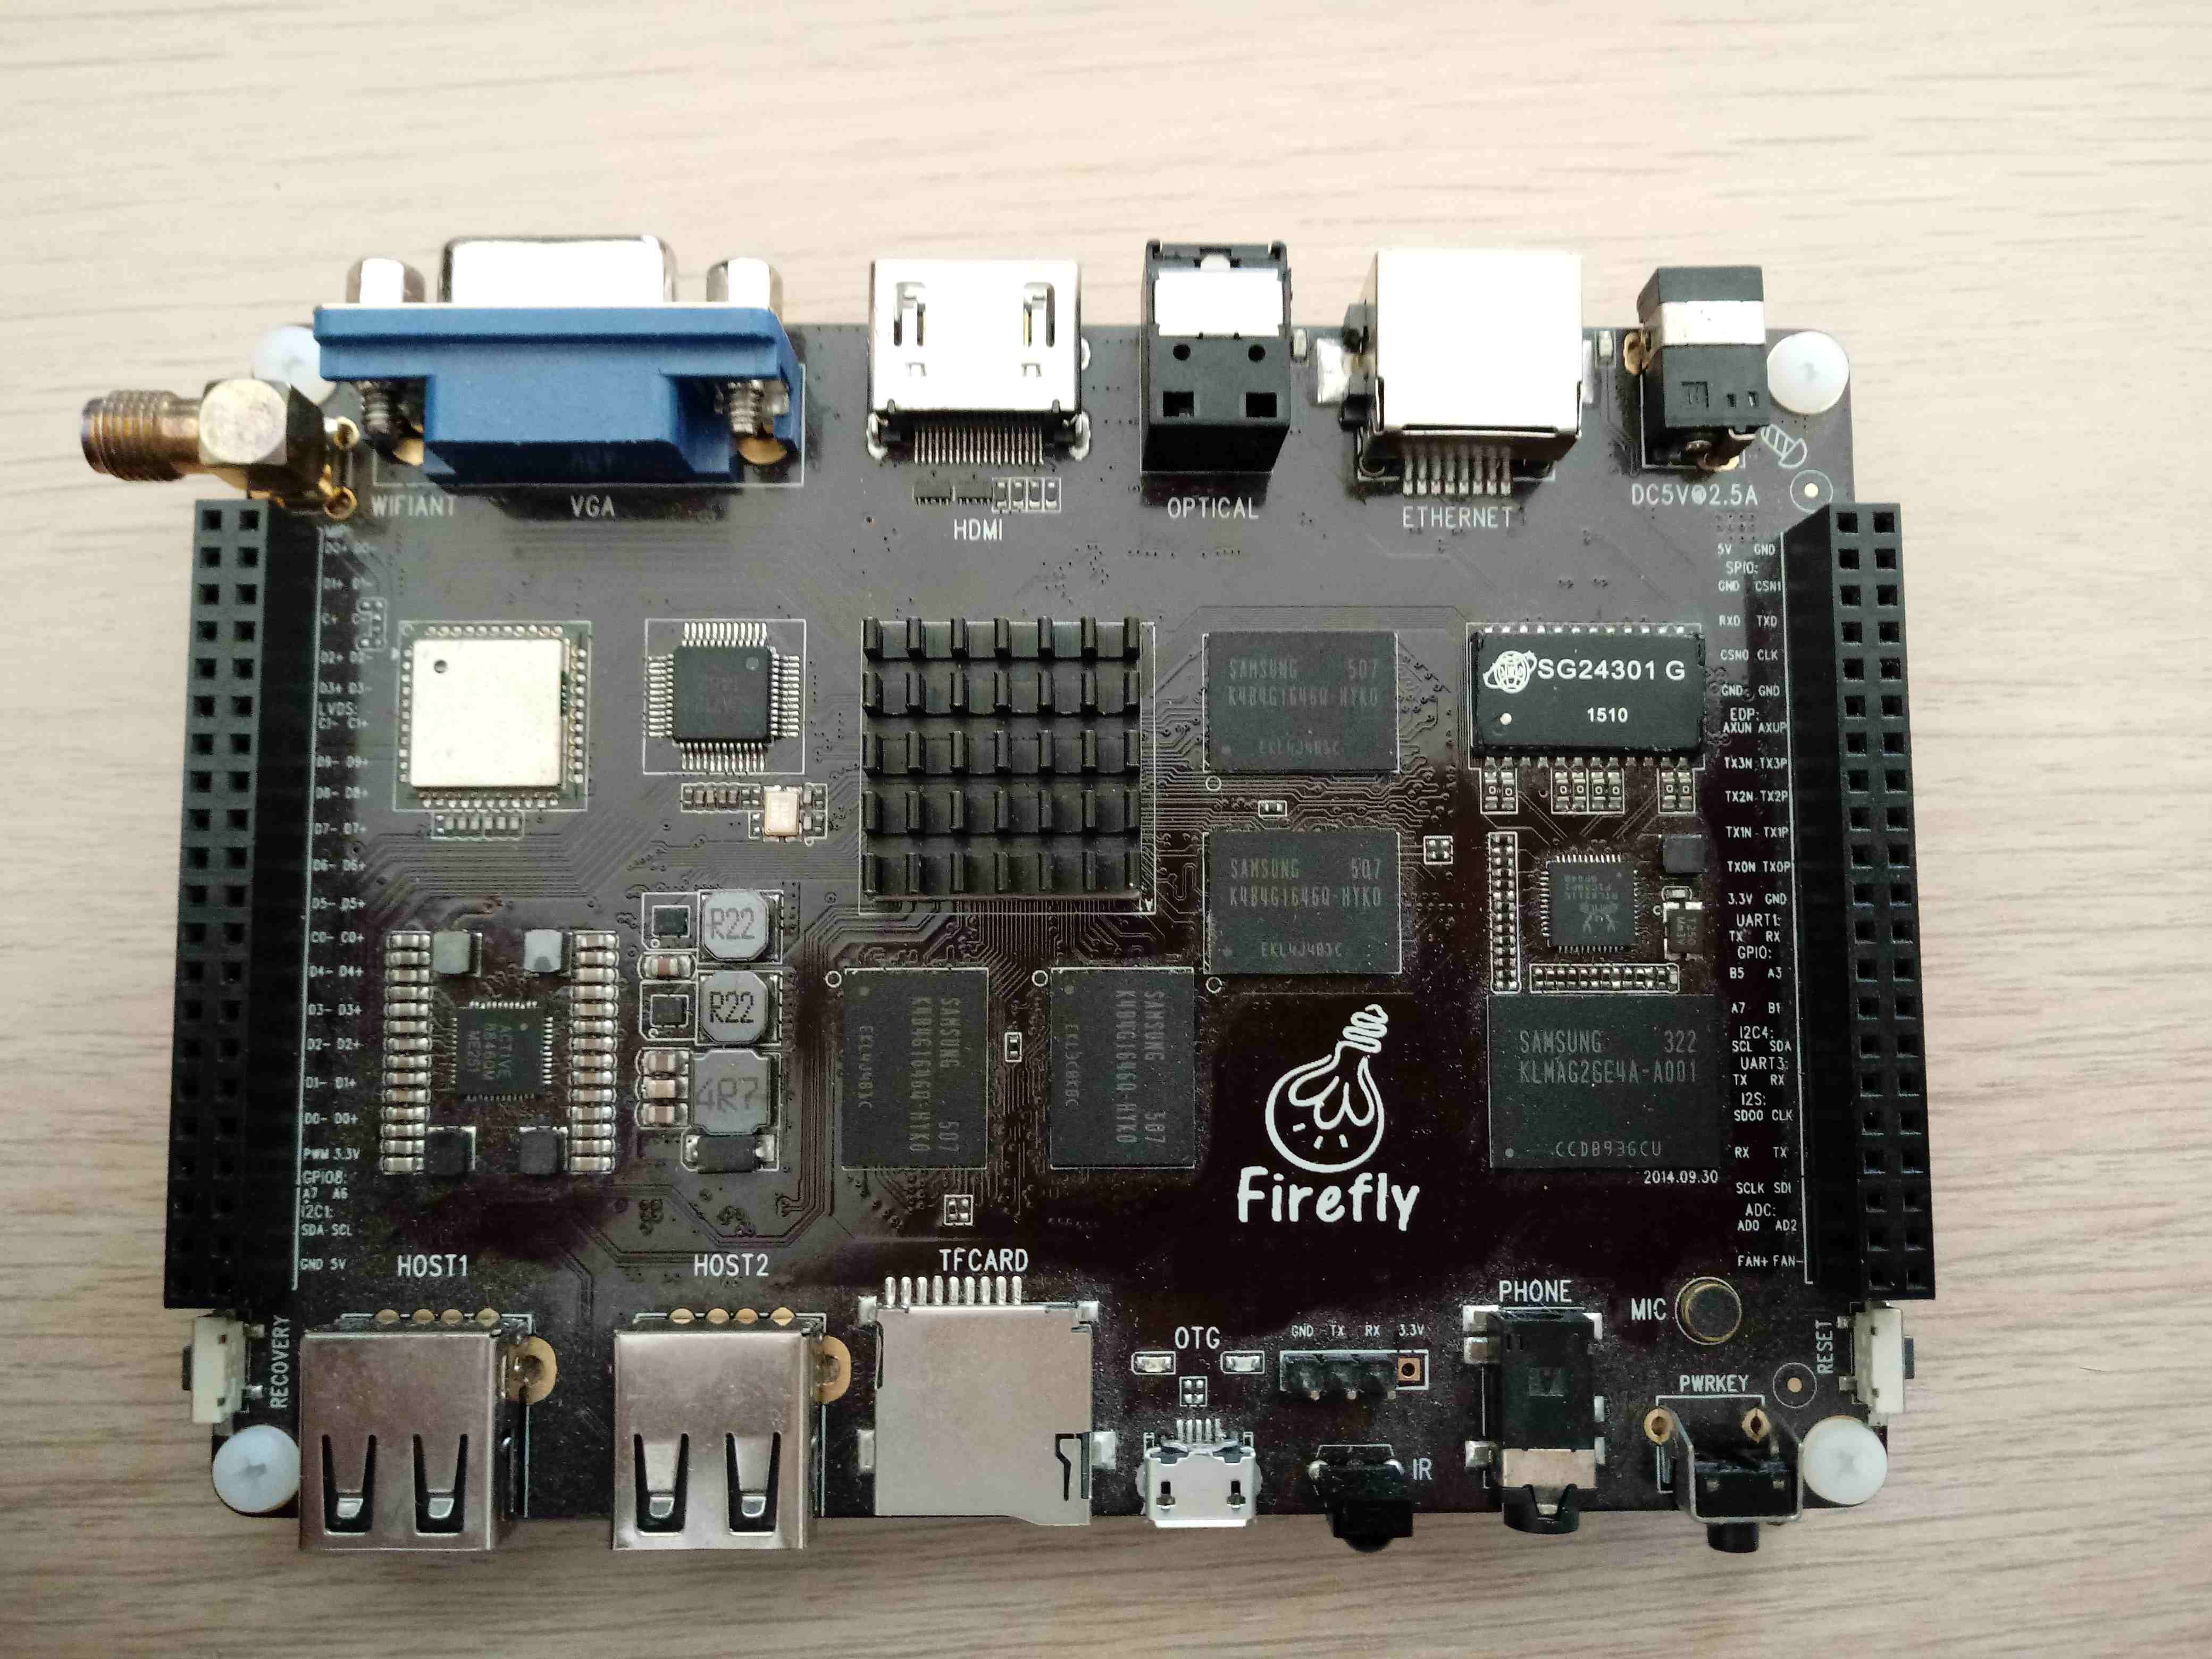
Firefly wiki has a page about entering MaskROM, with photos showing where eMMC clock is exposed, but the problem is that this does not match my board.
This is how the top part of my board looks like - no test points here.
The bottom side still differs from the board image posted on wiki.
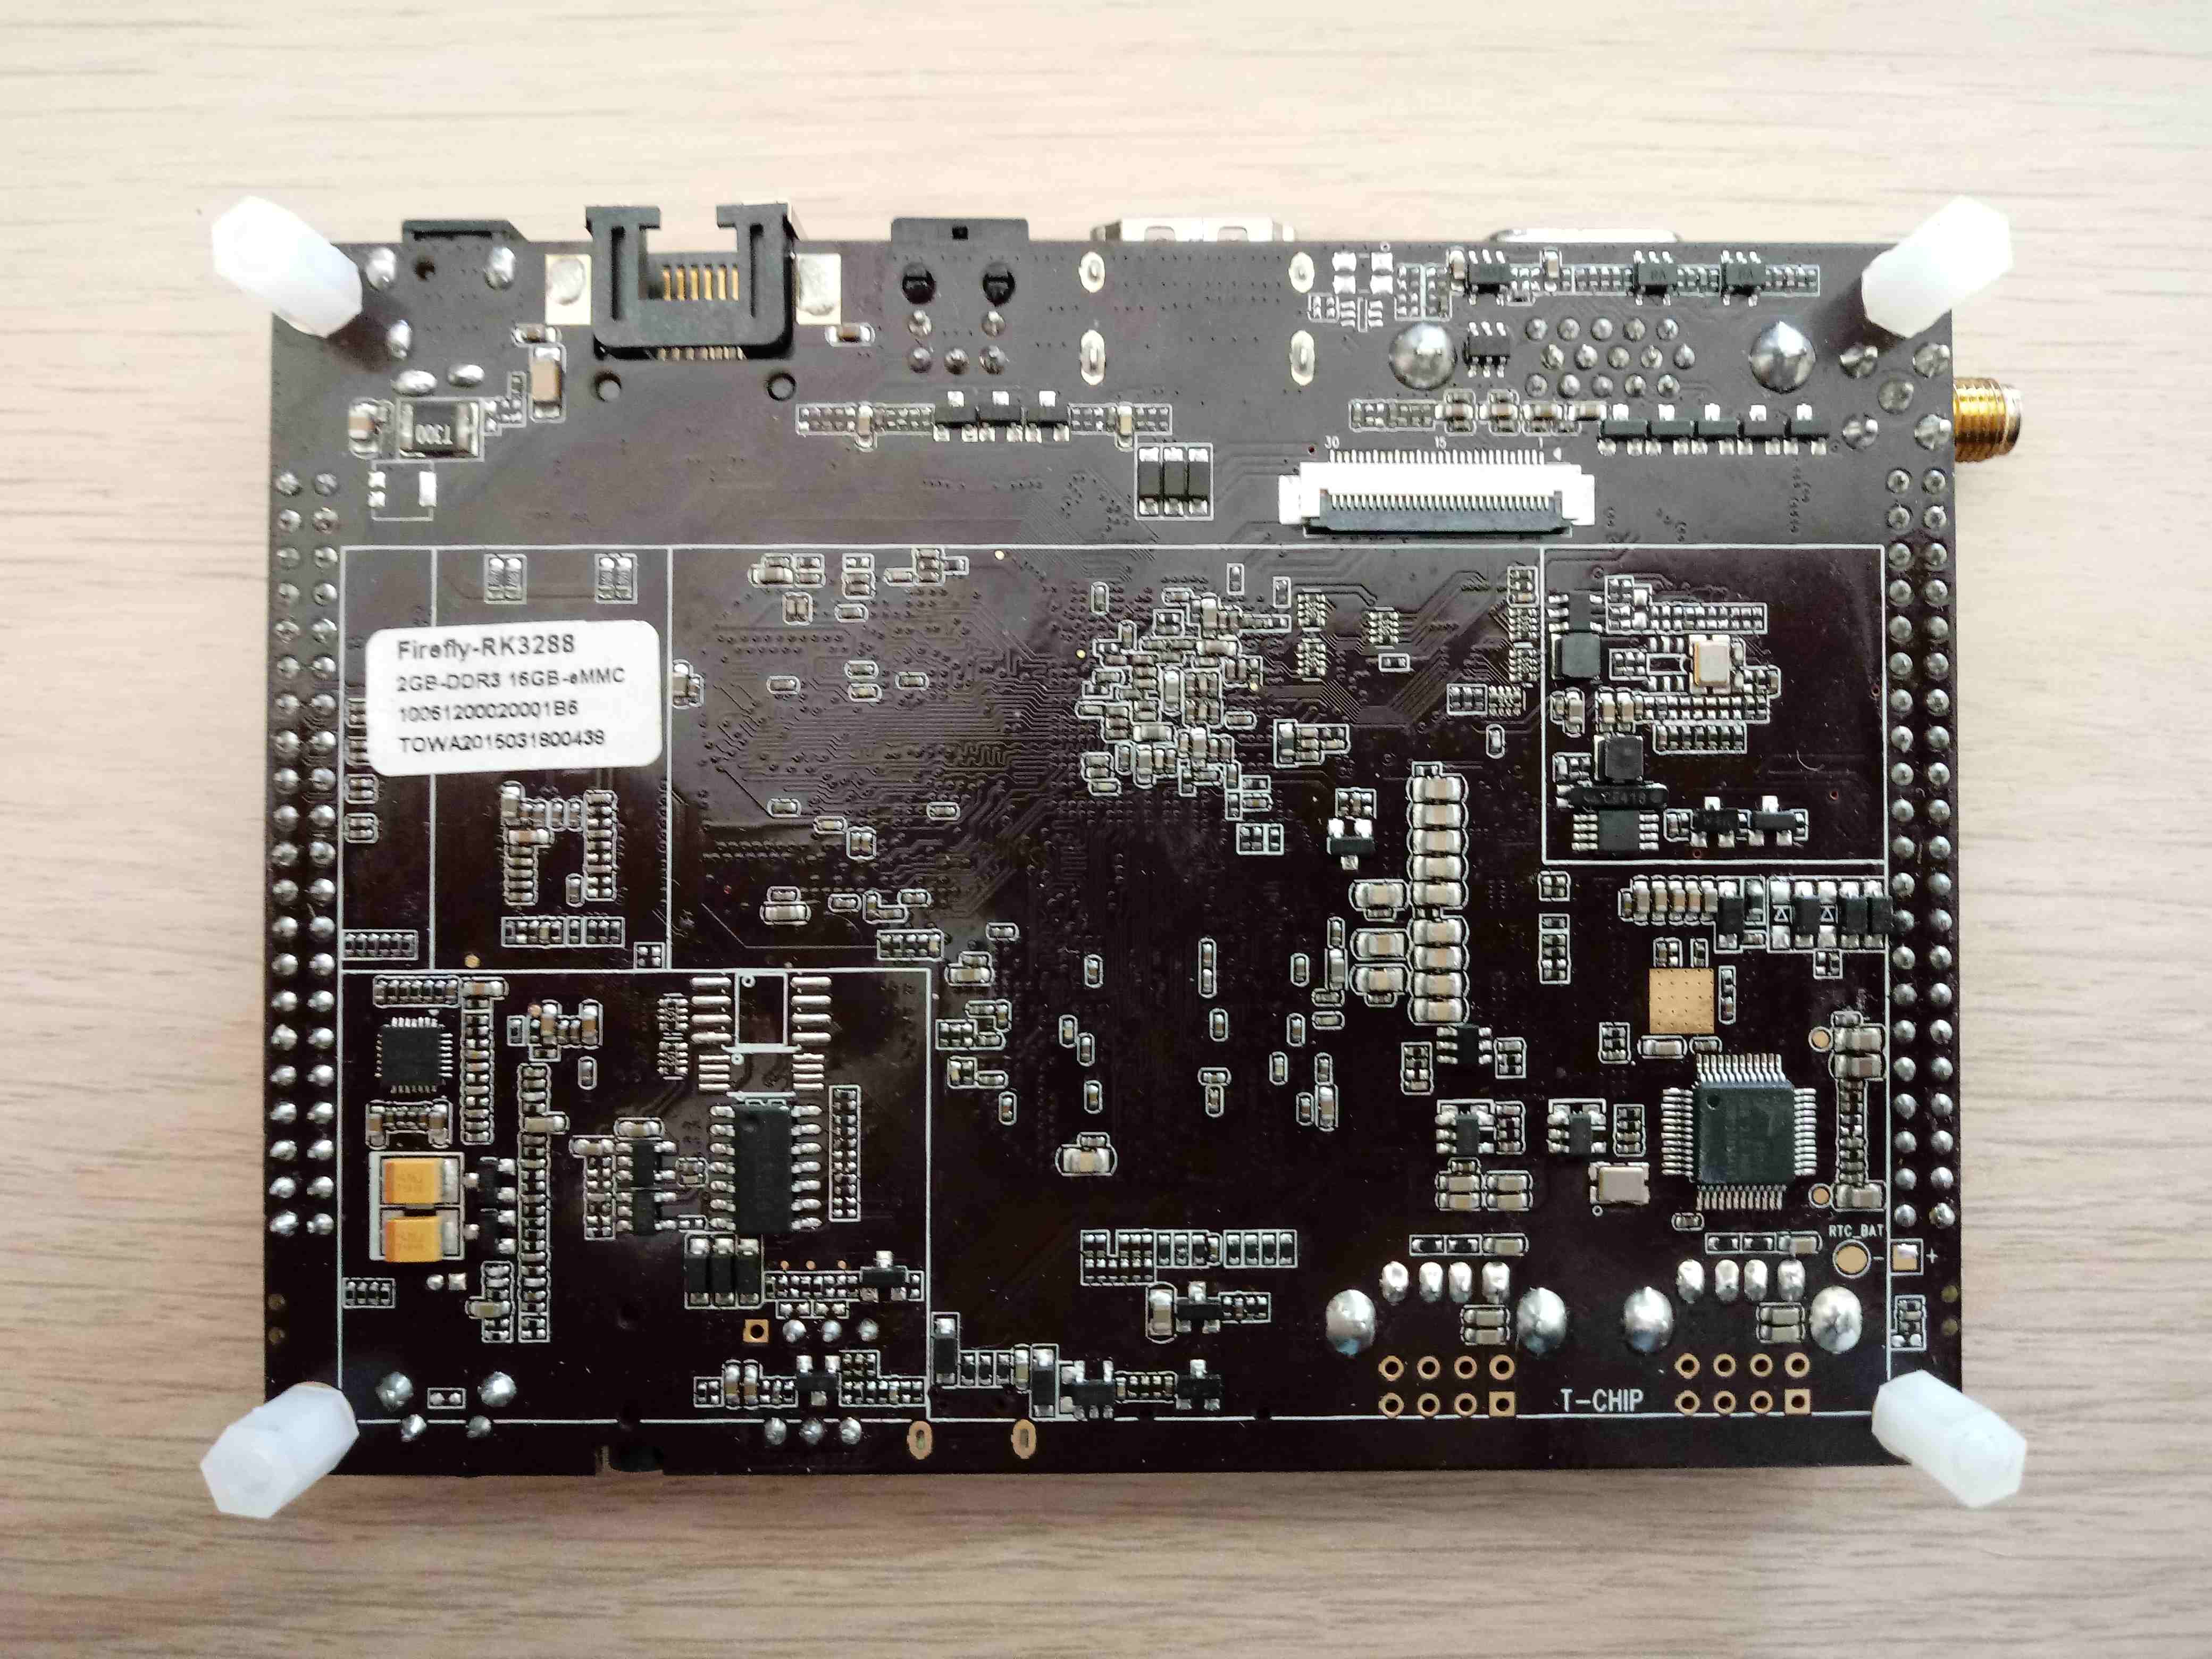
One of the pads looks like an eMMC clock, but I couldn’t be 100% sure if this is it. Anyway, that test point was very close to tiny resistors, which I could accidentally tear apart.
First attempt
Before loading binary into eFUSE Tool, I verified whether that binary works by using:
|
|
Loading went well, and DDR init started flooding my serial console with useless messages - so far, everything looks good.
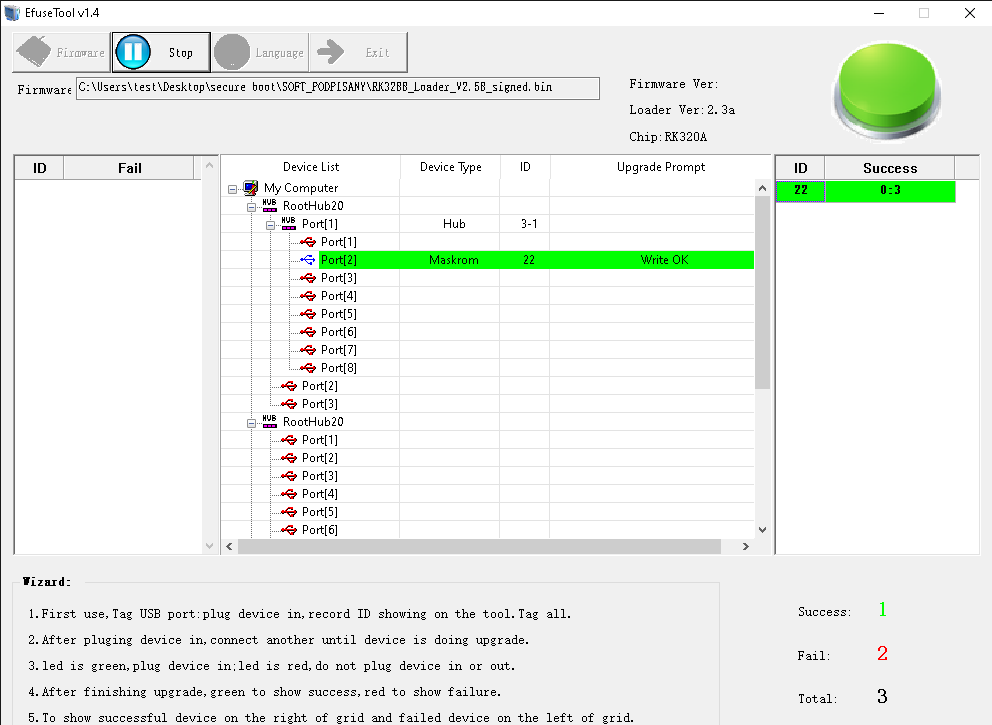
So I opened eFUSE Tool. Note that you can change the language to English.
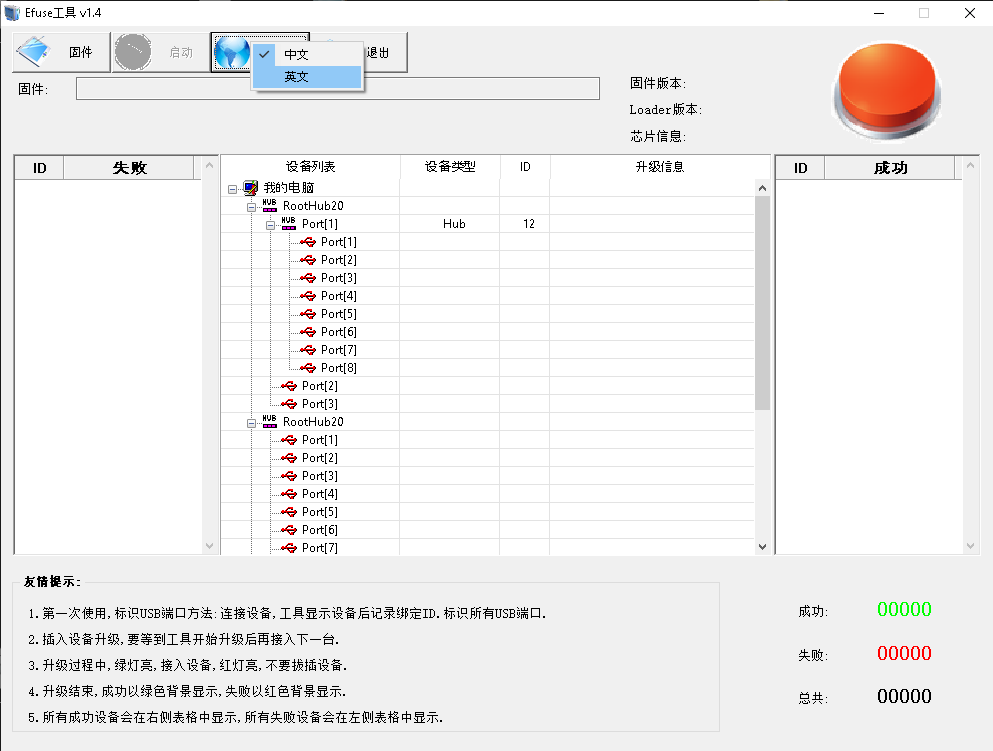
I loaded a signed loader binary, clicked Run button, and connected the device.
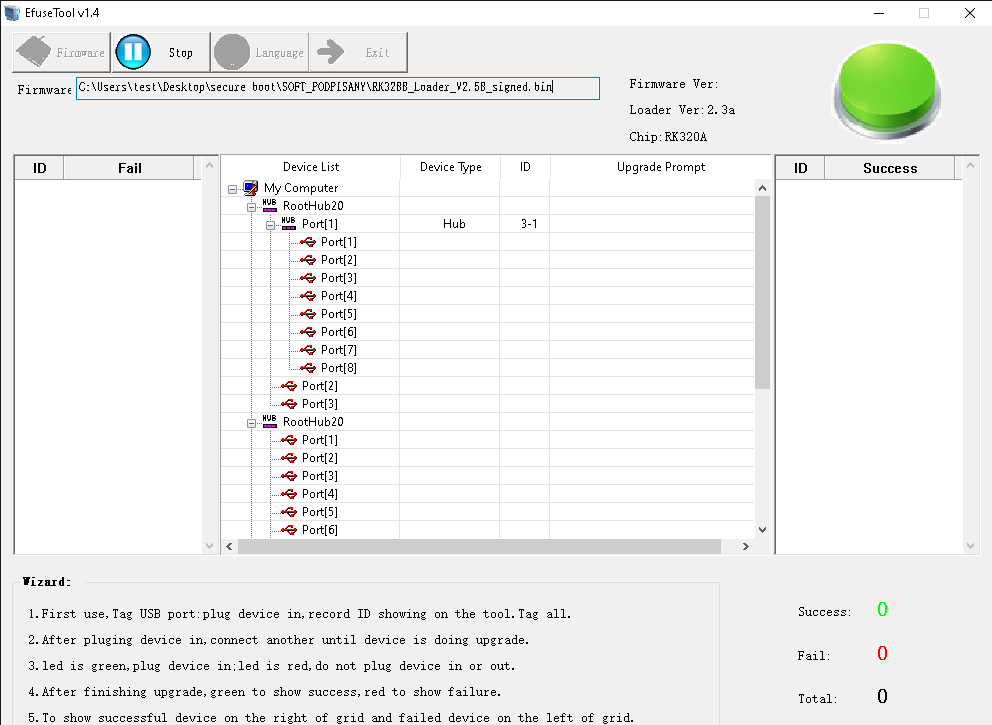
Unfortunately, eFUSE burning failed almost instantly.
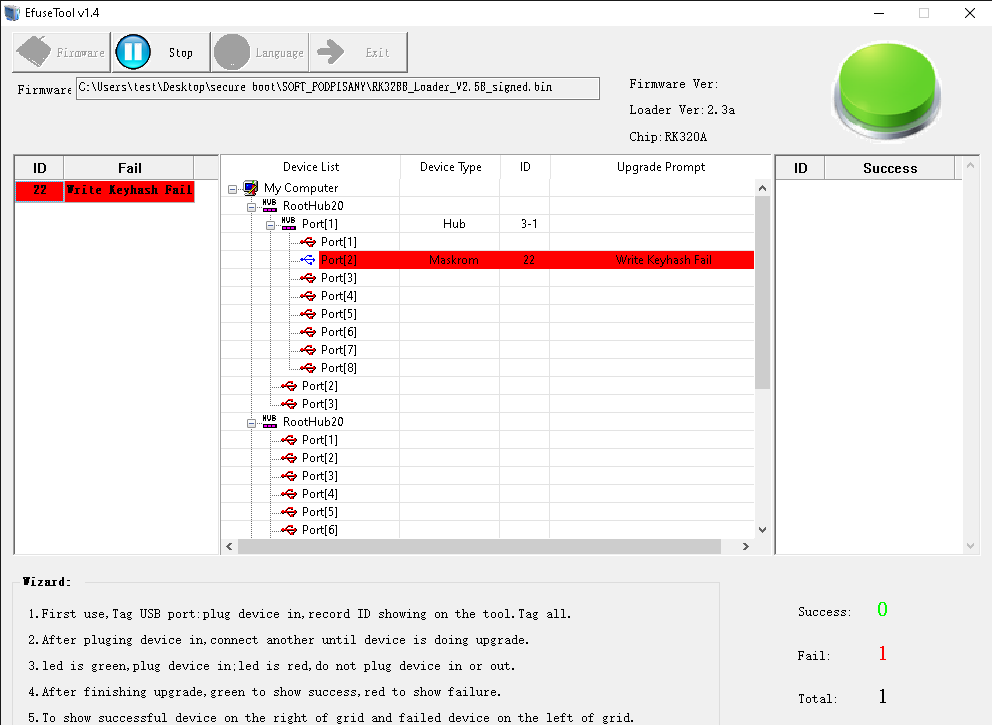
eFUSE Tool didn’t say anything useful. Actually, it didn’t say anything at all (no logs either). I’ve got some information dumped on the serial console, but still not very helpful.
|
|
Board turned out to be still alive, and nothing had changed in its behavior, so I carried on.
Problem analysis
I started looking for a solution, and I found a document titled
RK3399 Efuse Operation Instructions.
The most interesting is the last section called Efuse power up.

I downloaded board schematic from the Firefly support page (note that there are two board versions). Each download is a zip archive containing a schematic and board component layout. I didn’t know which board revision I had. Also, I couldn’t see any differences in schematics or layouts, so I double-checked that the relevant part is the same on both revisions.
This is what I have found:

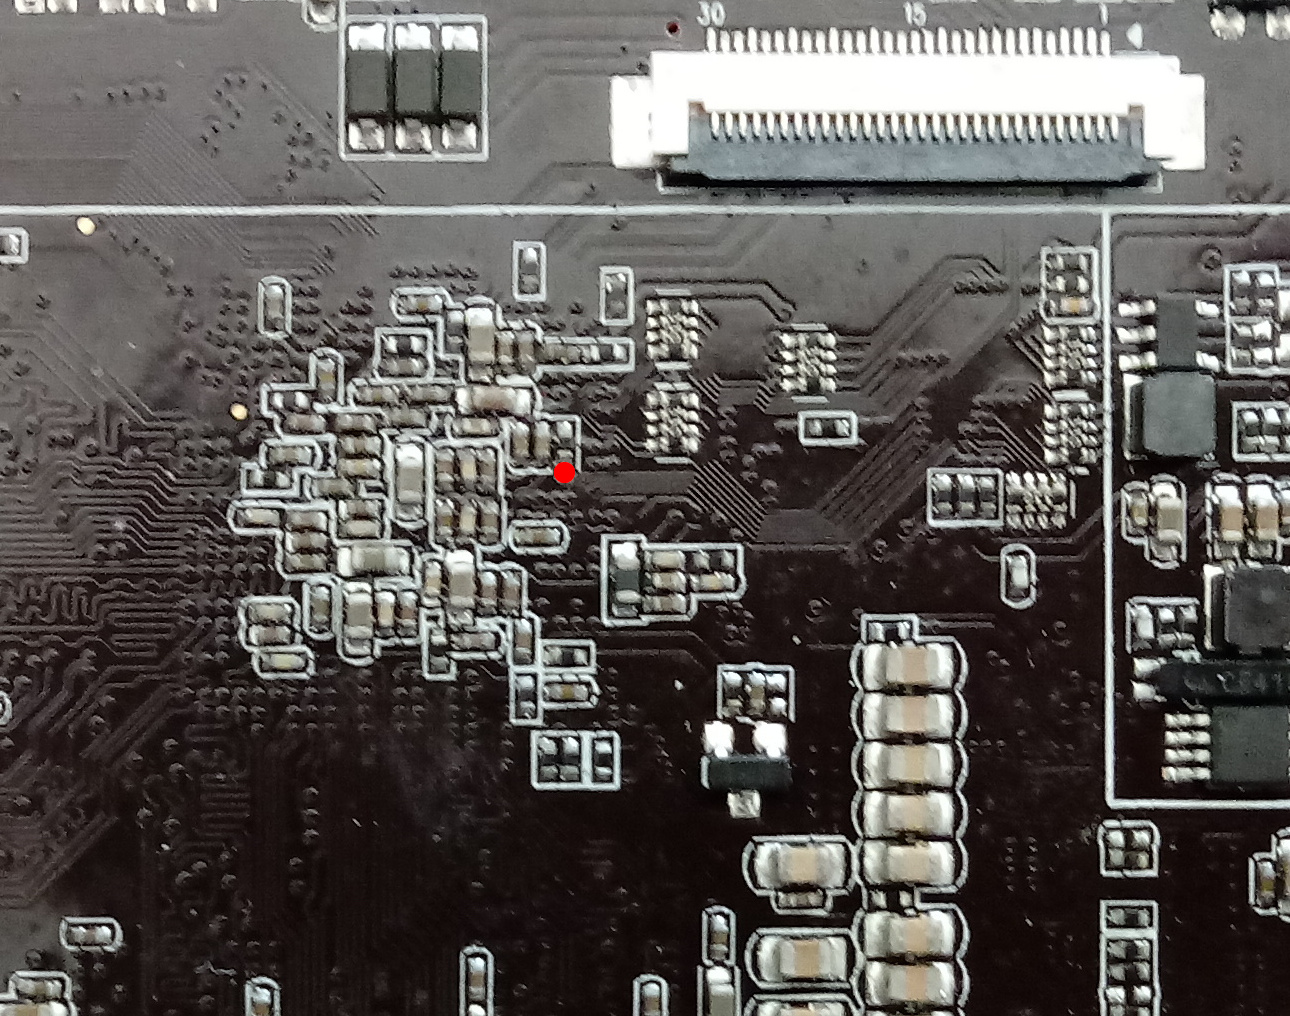
EFUSE_VQPS pin is connected to test point T17, located on the backside, behind the SoC.
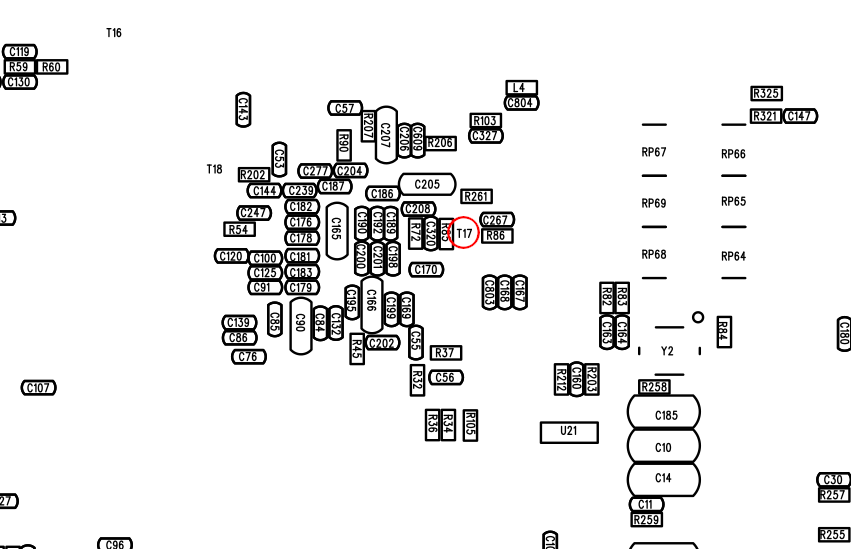
On the board, it is located here.
Attempt 2
I took a lab power supply. I tried to find some thin probes without success, so I used the probes I had, together with male jumper wires.
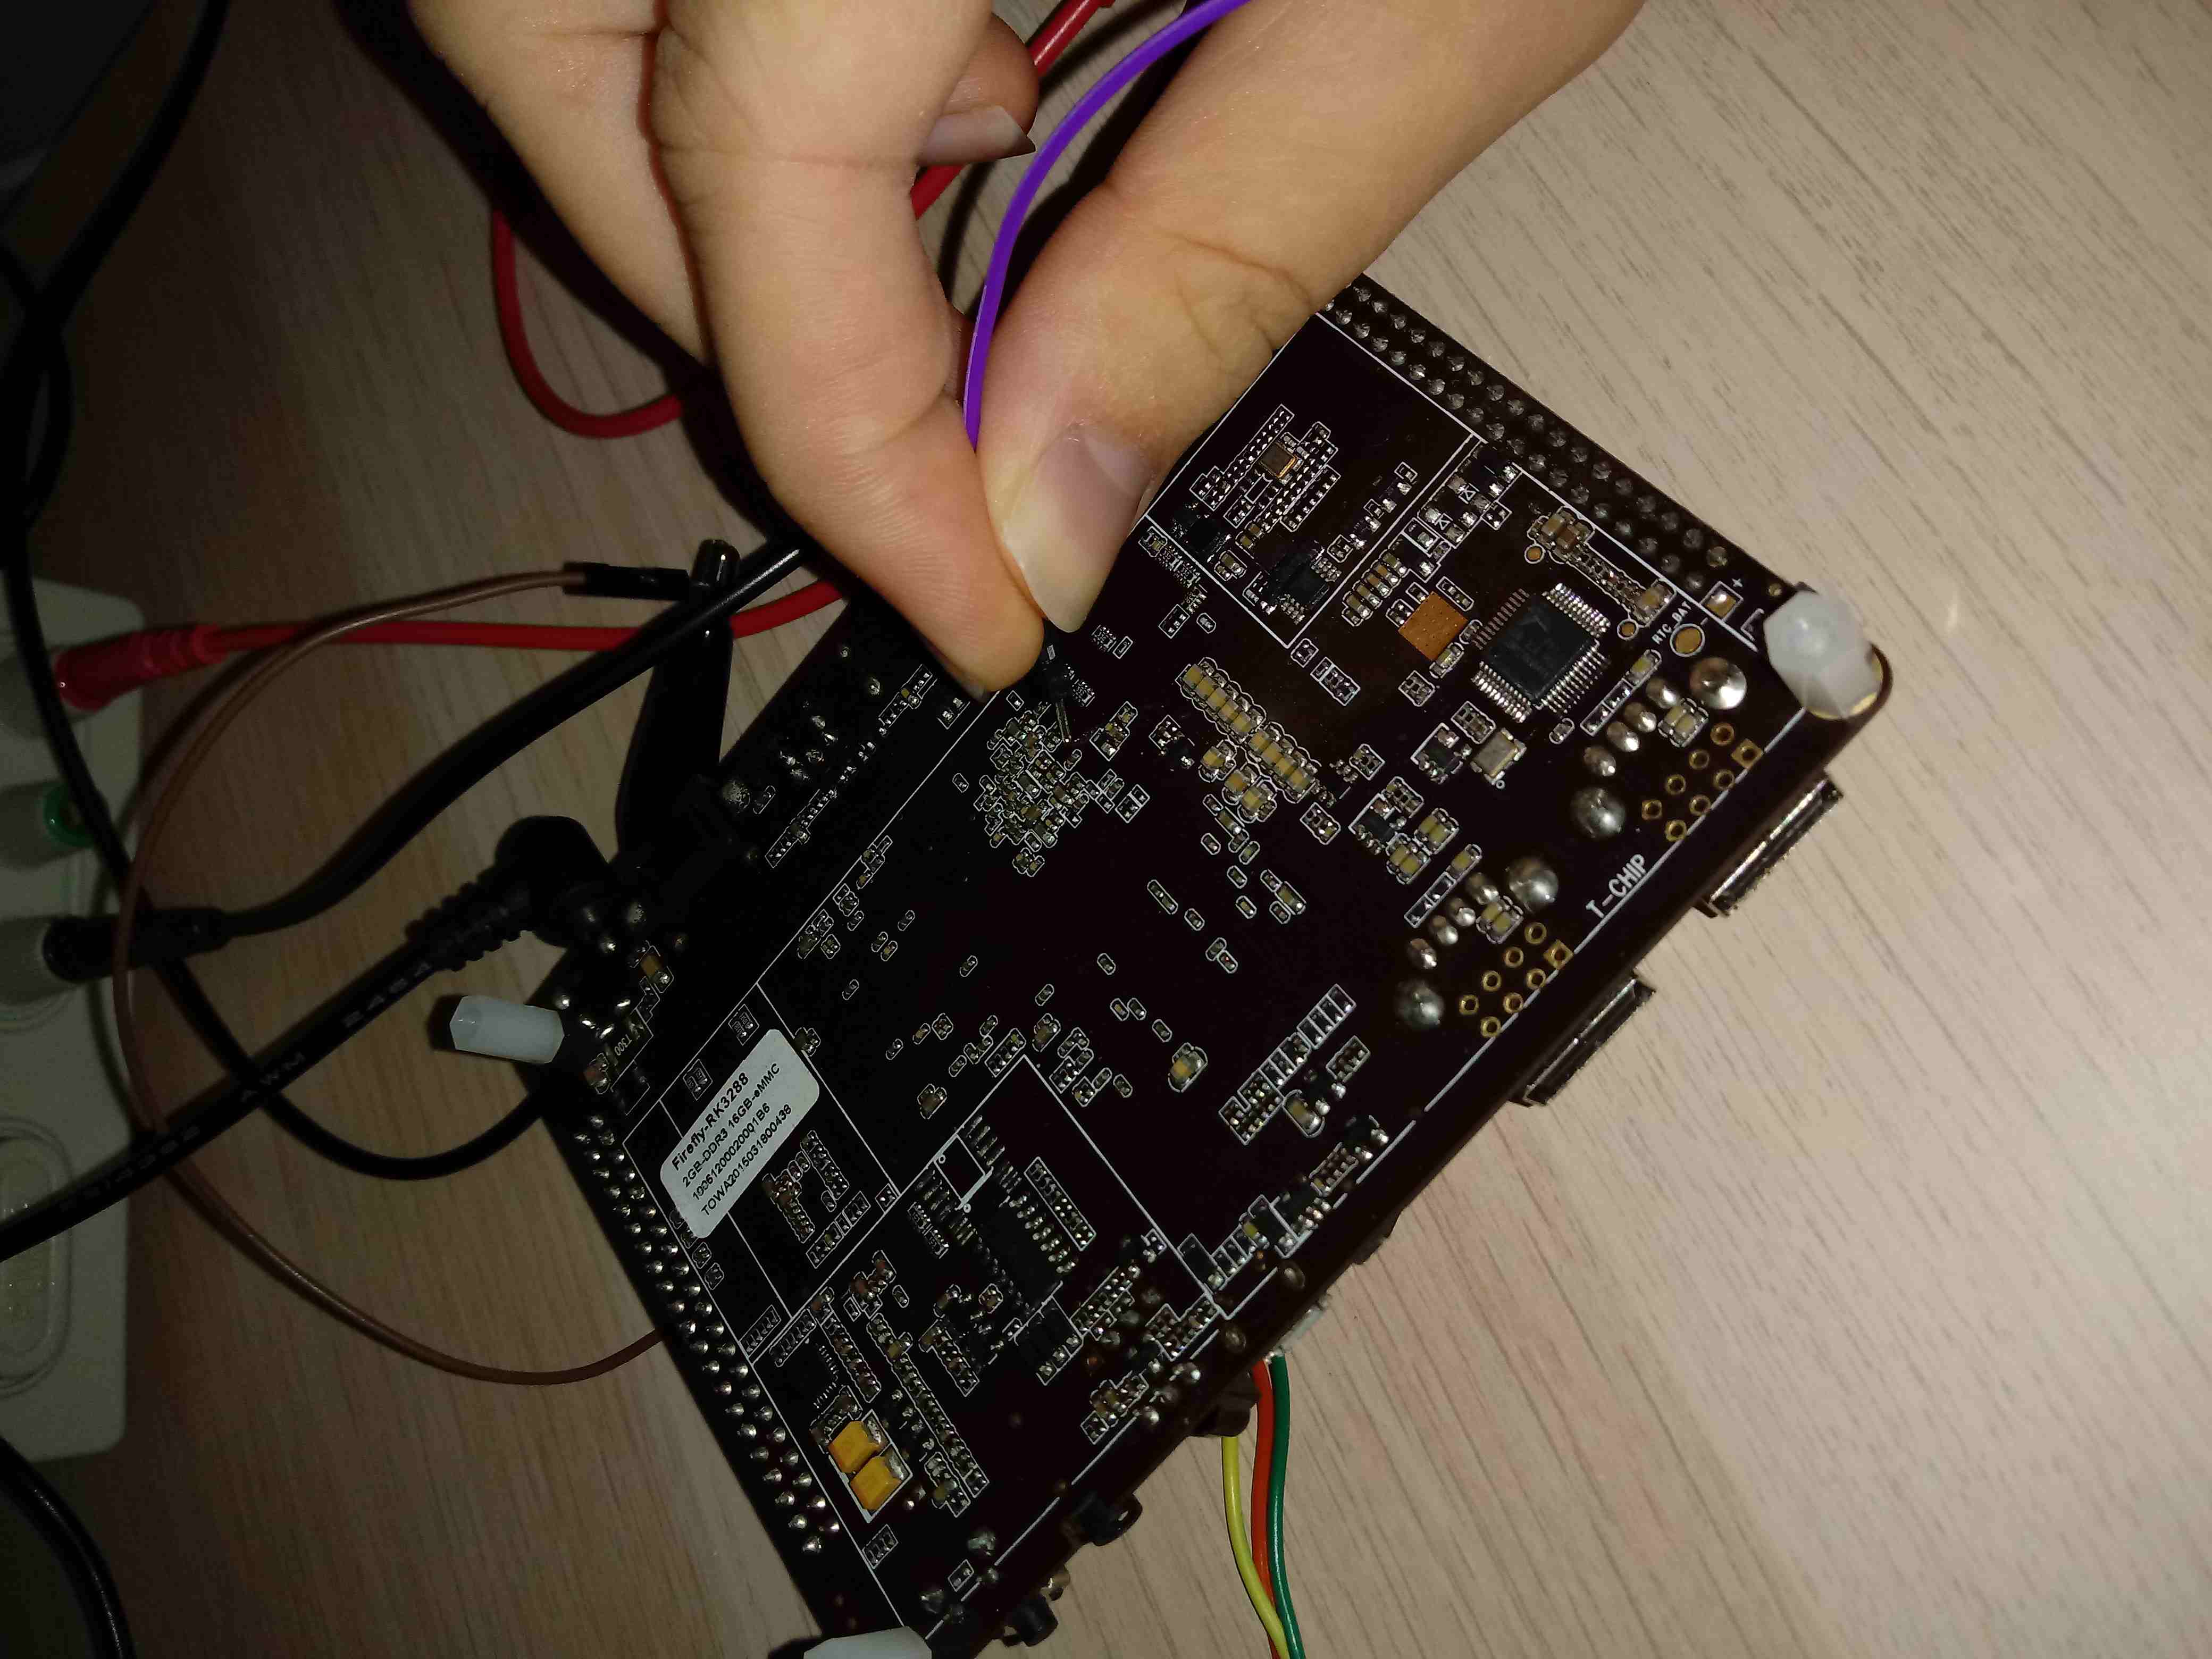
It took me a few tries before I succeeded - I was touching a tiny resistor placed right next to the test point, draining too much power, around 300 mA. This is very dangerous for the board. Luckily, my board survived. After a few tries, I got it right, and eFUSE burning succeeded.
What’s next
Board got into MaskROM mode, and I successfully ran a signed loader using
rkdeveloptool db. Messages from the serial console show that secure mode is
active.
|
|
Loading of unsigned one no longer works - rkdeveloptool hangs. MaskROM won’t
accept any commands until DDR Init is loaded, thus preventing unauthorized
access to eMMC and data dump. U-Boot from SD card no longer boots. You can see
it for yourself on the following video:
Loader can be flashed onto eMMC using the following commands. Note that this flashes only loader, without U-Boot itself.
|
|
Summary
So far, I have managed to get Secure Boot working on RK3288. Still, we need some
way to sign U-Boot’s idbloader.img. Also we need support for verifying U-Boot
image from SPL. These two topics will be covered in the next post. If you think
we can help in improving the security of your firmware or you looking for
someone who can boost your product by leveraging advanced features of used
hardware platform, feel free to book a call with
us or
drop us email to contact<at>3mdeb<dot>com. And if you want to stay up-to-date
on all things firmware security and optimization, be sure to sign up for our
newsletter:

