It happens very often that we do not have any burned installation image of our desired system on hand. Burning such an image, onto USB for example, can take several minutes. When someone gets a brand new hardware, user wants to use it as soon as possible, almost like a child with a new toy. But how to save those important minutes? The only thing that comes to the mind is network booting. In this article I will show you how easy it is to boot from network using iPXE on top of coreboot and SeaBIOS. Additionally I will demonstrate booting from HTTPS. Note that below method uses mainline coreboot from upstream repository. It differs from coreboot distribution provided by 3mdeb for PC Engines hardware.
Firmware image preparation
In this article I will use PC Engines apu4 as an example of building coreboot with SeaBIOS and iPXE. Believe me or not, it is pretty easy. To begin, clone the coreboot repository:
|
|
It may take a while with submodules. Next ensure you have docker container for building coreboot:
|
|
It also takes a while to download the image (about 2GiB). If you don’t have docker, refer to the documentation dedicated for your operating system, where you will find installation steps. Now when all the pieces are in place, launch the docker container and mount the directory with previously cloned coreboot source:
|
|
The command above mounts the directory called coreboot (should be present
after cloning in your current directory) to the /home/coreboot/coreboot inside
the container and automatically changes the working directory to it after
entering the container. Now you should have working bash inside the container:
|
|
For simplicity I will use the default apu4 configuration:
|
|
The default configuration for apu4 is loaded. We may for example disable/limit debugging by:
- Setting debug level to 0 in
Console -> Default console log level (0:EMERG) - Setting SeaBIOS debug level to o
Payload -> (0) SeaBIOS debug level (verbosity)
Now it is time to choose our iPXE configuration. Since the
iPXE HTTPS support has been
merged to coreboot recently, it is available by default when building iPXE from
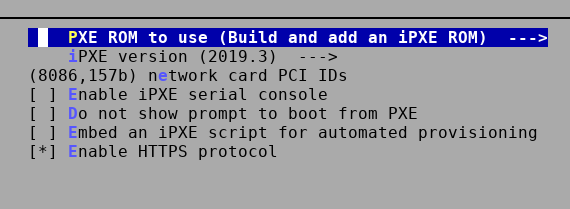
source. Move to the iPXE menu in Payload -> PXE Options ---> (only visible if
Add PXE ROM is selected). The menu for apu4 should look like this:

The network card PCI IDs should contain the vendor and device ID of the network controller on your platform. You can find it by running lspci -nn in Linux on the platform you are building coreboot for.
Now save the configuration and invoke the build:
|
|
When the image is built, it is placed in the coreboot source directory as
build/coreboot.rom. Go ahead and flash it on apu4 using flashrom:
|
|
Typical UEFI/BIOS has PXE embedded into firmware, so it is a matter of enabling it in setup menu.
Network booting
Now, if you have flashed the image try rebooting the platform. The output on serial port on apu4 will look as follows:
|
|
When the iPXE prompt appears, press Ctrl+B to enter iPXE shell:
|
|
Now you have variety of options:
- Boot network installation of your favorite system,
- Boot kernel and initrd directly to diskless systems using NFS,
- etc.
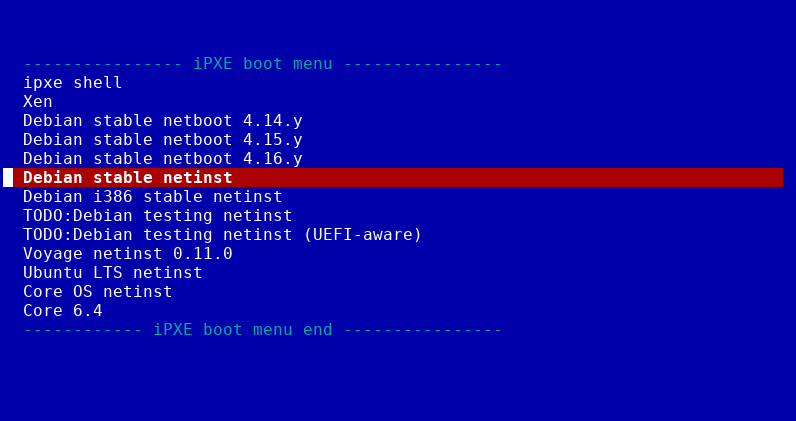
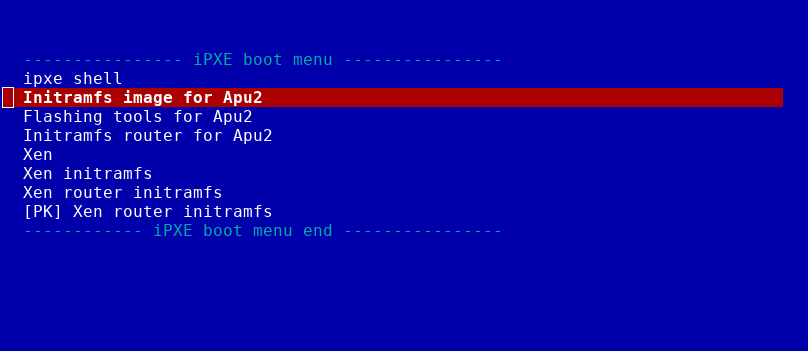
Example menu entries used by 3mdeb are available on 3mdeb GitHub Those are HTTP only. To boot such menu user has to setup the 3mdeb PXE server which uses the netboot repository and invoke the following from iPXE shell:
|
|

You can invoke Debian network installation or direct booting to diskless systems.
It is also possible to use autoboot command which will boot form the provided DHCP options, but this requires proper DHCP configuration providing the IP address, and path to the desired image to be loaded and executed.
Booting with HTTPS
As you noticed in previous section, it is possible to boot using HTTPS (see features):
|
|
3mdeb has a HTTPS server which hosts a simple menu for development of various projects and platforms (as it is only for development purposes the options in menu presented below may not necessarily work each time).
To boot 3mdeb menu, invoke the commands in iPXE shell:
|
|
Sometimes during the menu.ipxe file loading, iPXE shortly prints the certificate name from Let’s Encrypt.

The above proves that HTTPS works on iPXE. However, there are still issues with
certain certificates. In the default configuration, iPXE trusts only a single
root certificate: the iPXE root CA certificate. This root certificate is used
to cross-sign the standard Mozilla list of public CA certificates. In the
default configuration, iPXE will therefore automatically trust the same set of
certificates as the Firefox web browser. More details on
iPXE documentation
Future
This article is just a beginning. Our plan is to support booting TrenchBoot
enabled images over HTTPS with image verification. In the series I will show you
how to utilize the imgverify iPXE command used to verify downloaded images and
embed your own iPXE scripts, so stay tuned.
If you think we can help in improving the security of your firmware or you
looking for someone who can boost your product by leveraging advanced features
of used hardware platform, feel free to book a call with
us or
drop us email to contact<at>3mdeb<dot>com. And if you want to stay up-to-date
on all things firmware security and optimization, be sure to sign up for our
newsletter:
