AMG55 - recognition in the field
If you are considering working on SAMG55 Xplained Pro board here you will find some basic know-how to quickly get you started.
What you will need?
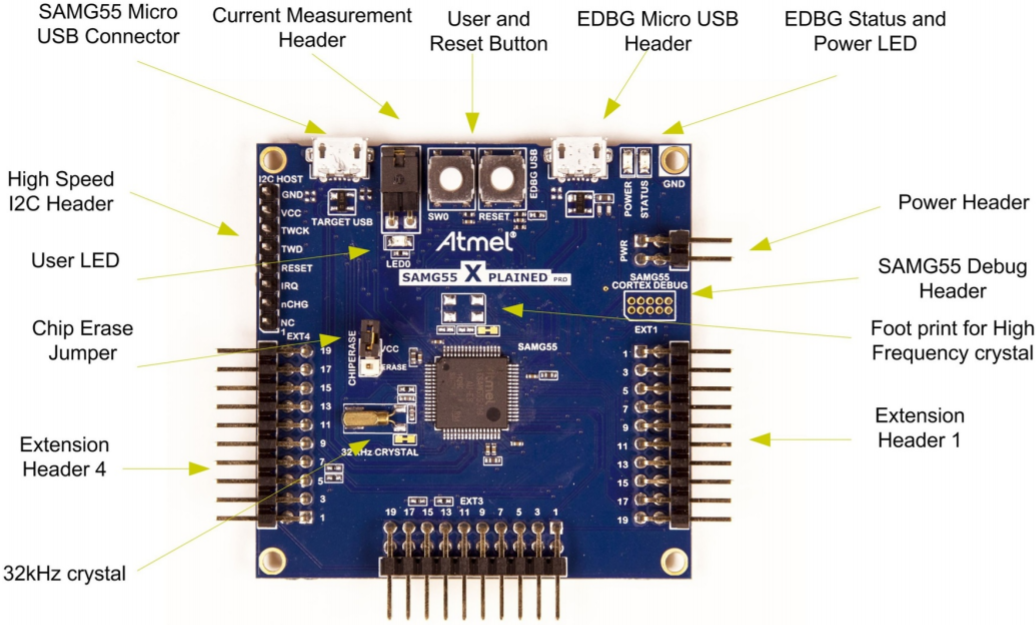
In this example I will be using SAMG55 Xplained Pro with OLED1 extension board, and Atmel Studio 7.0 with Data Visualizer addon, which requires Windows to work. This however should be similar for other board with EDBG debugger.
Word of explanation
Before we start taking any action:
EDBG- on board debugger, that will simplify debugging process, and allow us to easily program chip without any external tools.ASF- Atmel Studio Framework, used for downloading and installing useful stuff, like libraries and APIs for specific extensions.
Getting started
To get to know the code, and typical project setup check out example projects, you can find there samples for many boards, their extensions and their usages. e.g. getting MAC address from WIPC1500 or finding available AP using same board.
Adding Support for extensions
Get some extension to work with your code may be tricky, and not always will
work out of the box. Let’s follow the process of enabling OLED1 Xplained Pro on
SAMG55 Xplained Pro, using ASF Wizard. As a starting point, im going to use
example project Getting-Started Application on SAM - SAMG55 which gives us
simple code that will blink on-board led (LED0). This action however can be
disabled using on-board button (SW0). Our goal is to print on OLED1 display
whether function is currently on, or off. To do that, we will need to add OLED1
libraries first. You could add them by hand, but there is a tool that will do
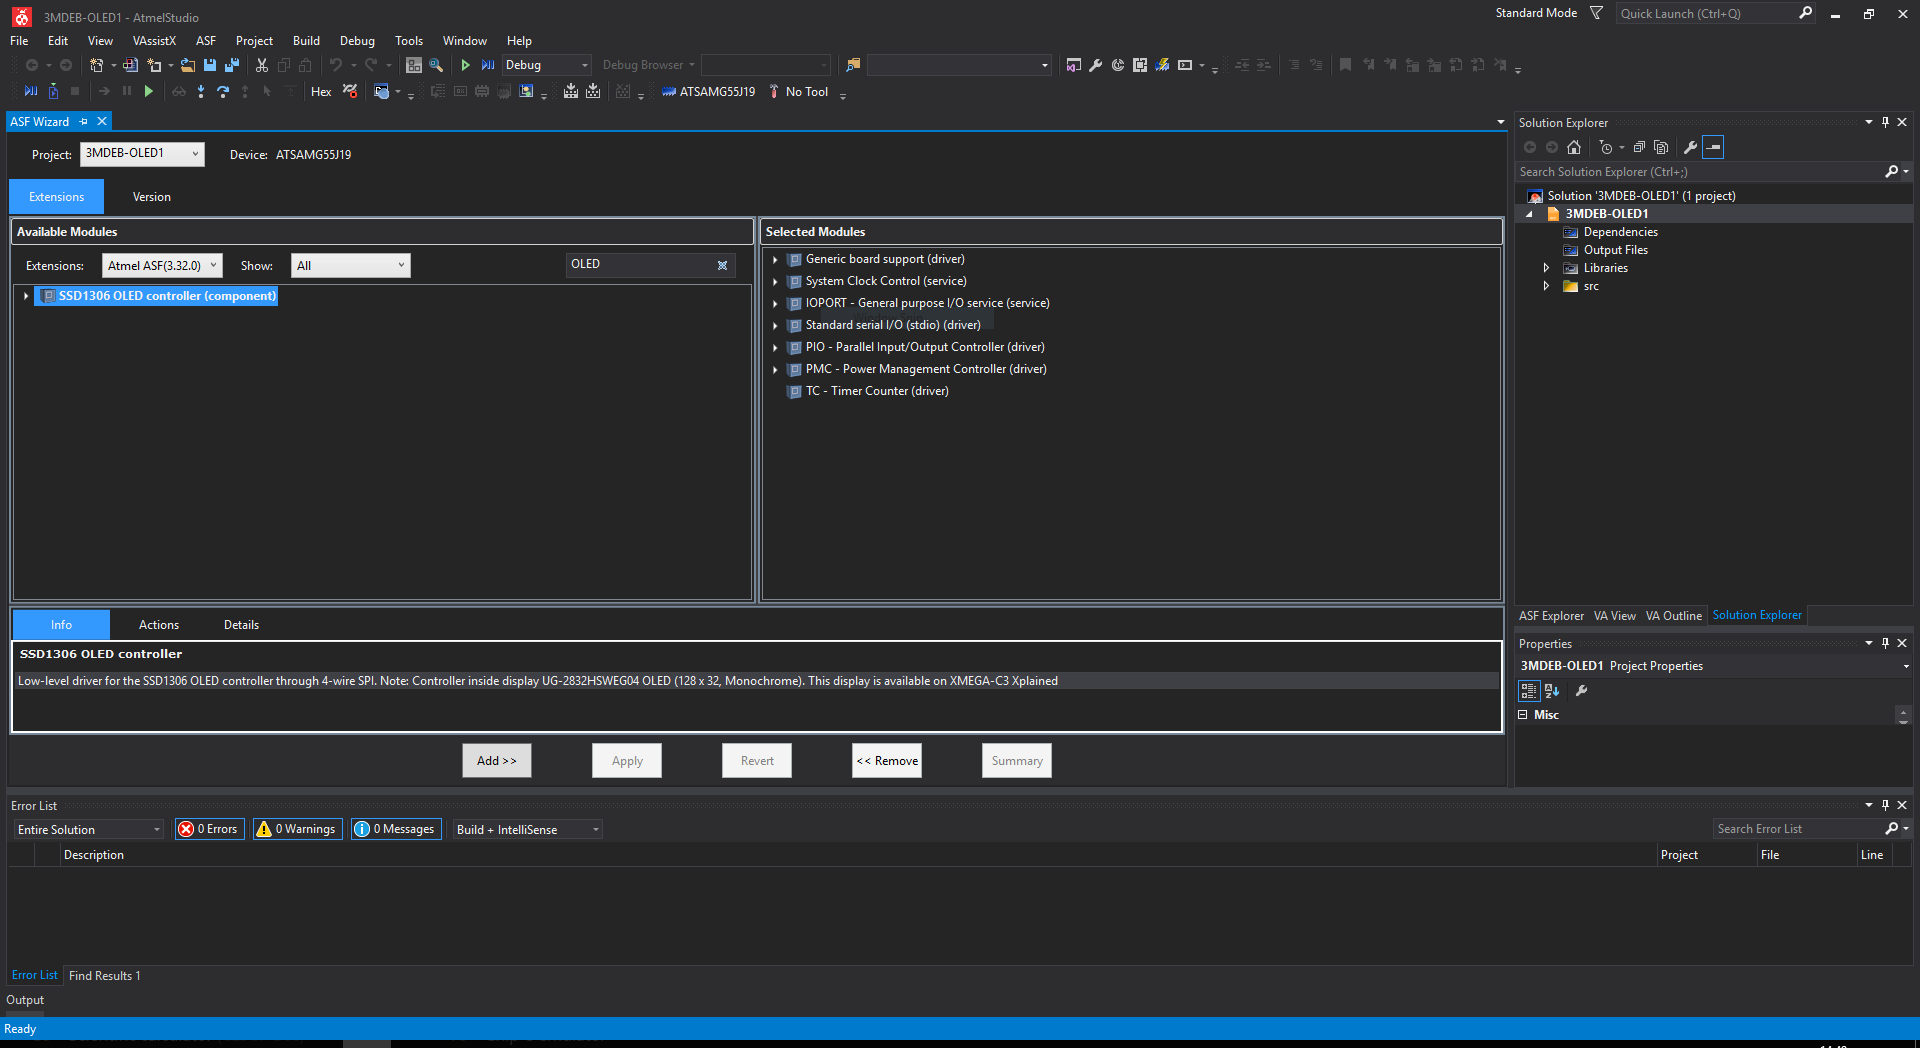
that for you. Open ASF Wizard, and find there
|
|
select it, and apply changes.
Now your Solution Explorer got few more files. You may add simple chunk of code in the main function:
|
|
But this will not work yet, you sill need to do some configuration. Both files
to change you can find in config/ folder first one is conf_board.h In there
you have to add these lines:
|
|
Second one is conf_ssd1306.h In which you have to change:
|
|
Note, that these values are there twice, one time in if, that check whether
your board is XMEGA_C3_XPLAINED or XMEGA_E5_XPLAINED, if it is, then change
these values. For every other board, values can be found at the end of the file.
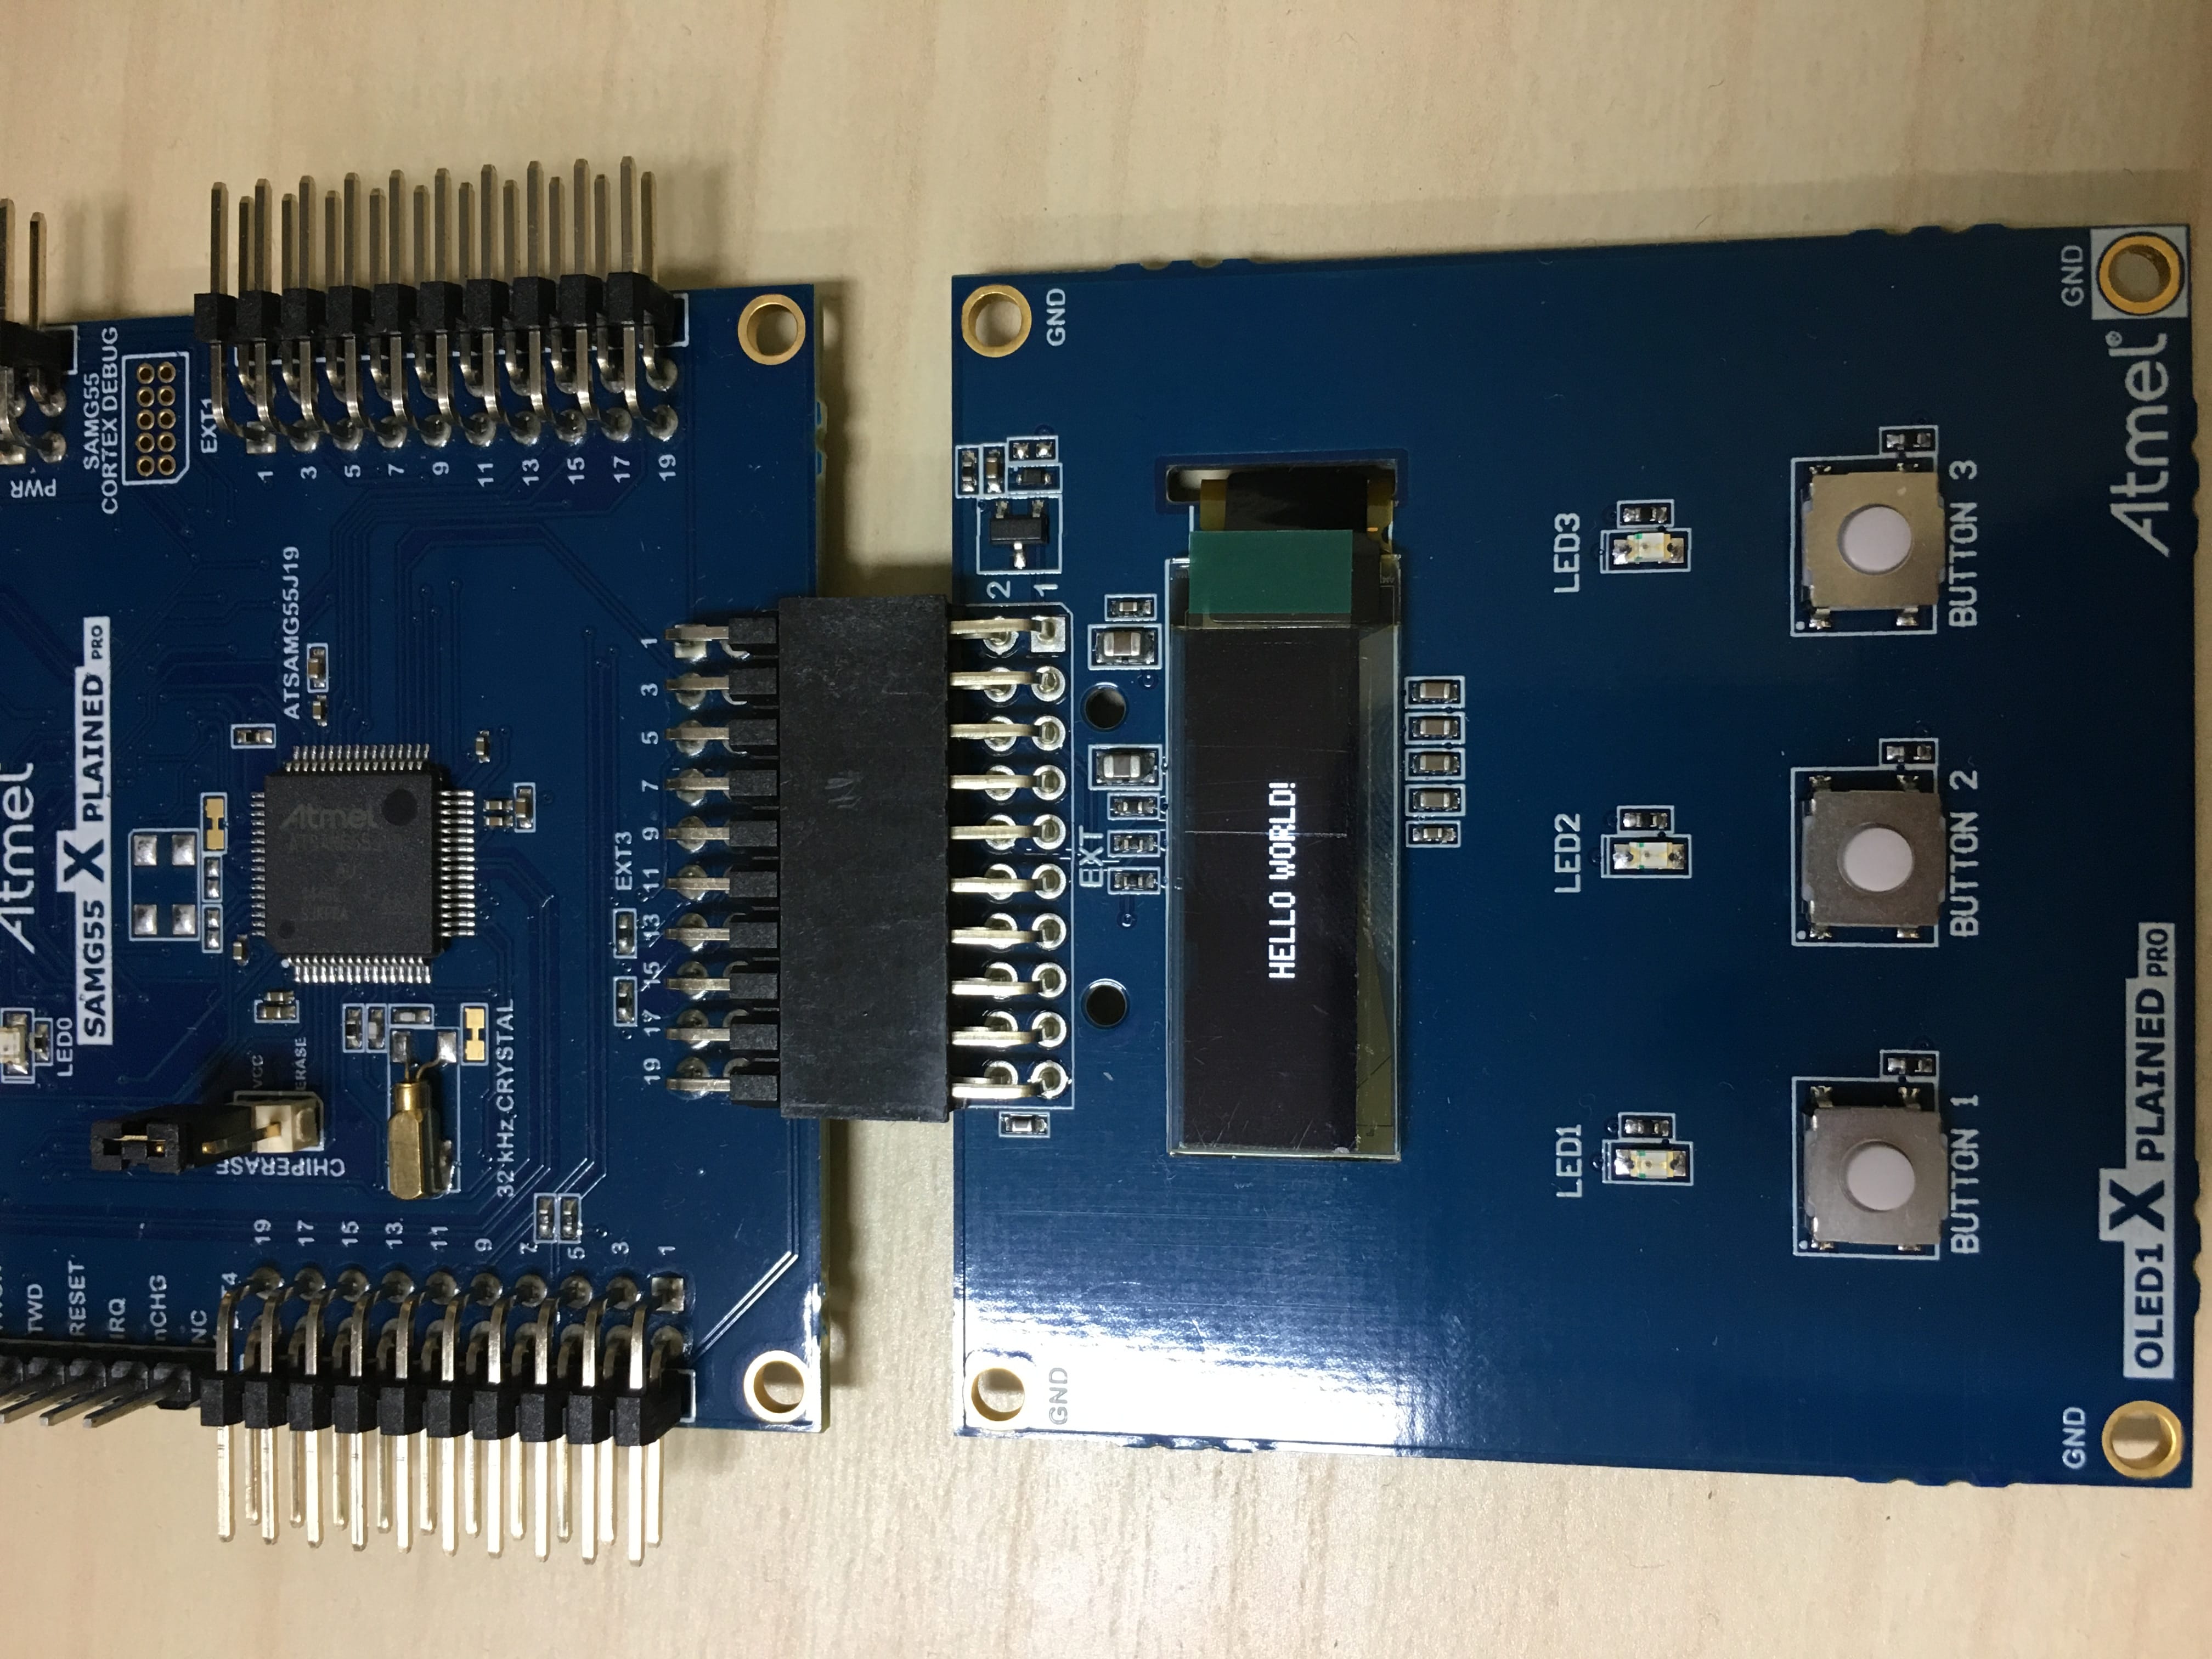
In the same place you will find comment explaining their meaning. comment. After
these changes, all you have to do is connect the board, using microUSB and
connecting it to EDBG USB port, wait for Atmel Studio to find board, select tool
EDBG, interface SWD and program the chip. After short amount of time, you
will see “Hello World” on display, and blinking led. To make it show whether
function is active or inactive, change last while loop in main.c to something
like this
|
|
You might have noticed that printf("1 ");, and was wondering where you can
find it’s output? Serial console can be opened using Data Visualizer which is in
tools menu (if you have it installed), on the left side of it is configuration
option, that will open panel, with several options to chose terminal can be
opened selecting External Connection and Serial Port. Before connecting,
remember to change baudrate to 115200. Now you are all set up, and ready to
code.
Sources
SAMG55 Xplained Pro documentation
- Data Gateway Interface
- DGILIB for DGI
- EDBG
- SAMG55 Xplained Pro
- SAMG55 Xplained Pro Datasheet
- SAMG55 Xplained Pro Datasheet summary
- All SAMG55 Documents
OLED1 Xplained Pro Documentation
Summary
As you can see, starting with Atmel SAMG55 Xplained Pro can be easy. I hope
that provided information are easy to read, and useful. If they are not, please
leave a comment. Thanks for reading.